


PYTHON / Pixel Art in Blender
Unknown
5:20 PM
abstract
,
capcom
,
design by numbers
,
draw
,
gameart
,
gangnam style
,
john maeda
,
list
,
mario
,
matrix
,
megaman
,
mosaic
,
mushroom
,
pixel
,
pixel art
,
processing
,
psy
,
random
 |
| 100% Made in Blender Pixel Art. No mouse, no 3D geometry, just keyboard and Python. |
BLENDER BY NUMBERSInspired by John Maeda's Design By Numbers

INTRO NOTE, updated 2013.03.13
When starting this "Pixel Art in Blender", I did not think to go this far. I began by borrowing some info and script from Blender Scripting blog (by Dealga McArdle).
Later on as I go along in simplifying the script, I slowly starting to understand what his script is actually doing. I also started to look around everywhere for information to help me understand the process further.
I found this book below is helpful
"Introduction to Computing and Programming in Python - A Multimedia Approach"
by Mark Guzdial and Barbara Ericson".
http://www.amazon.com/Introduction-Computing-Programming-Python-Edition/dp/0132923513/ref=dp_ob_title_bk/182-7879843-1920335
Similar example:
http://www.csse.monash.edu.au/~berndm/JMSS/python/tutorials/picture%20processing/
It is a basic Computer Science on Image Processing, but applicable for what we are doing: to be able to use Python to create and modify pixel.
For Blender artists with no interest with Python programming (yet!), you can use few scripts down below that allows you to:
Thank you again to Dealga McArdle at Blender Scripting blog for wealth of information there waiting to be discover and John Maeda for truly inspiring way of thinking in simplicity and attention to details.
Later on as I go along in simplifying the script, I slowly starting to understand what his script is actually doing. I also started to look around everywhere for information to help me understand the process further.
I found this book below is helpful
"Introduction to Computing and Programming in Python - A Multimedia Approach"
by Mark Guzdial and Barbara Ericson".
http://www.amazon.com/Introduction-Computing-Programming-Python-Edition/dp/0132923513/ref=dp_ob_title_bk/182-7879843-1920335
Similar example:
http://www.csse.monash.edu.au/~berndm/JMSS/python/tutorials/picture%20processing/
It is a basic Computer Science on Image Processing, but applicable for what we are doing: to be able to use Python to create and modify pixel.
- Draw A Pixel
- Import Pixel Art and turn it into 3D
NOTE: There is also a Video Tutorial I just made today. Scroll down to the very bottom.
Being able to understand how a script works is definitely very rewarding, especially true for newbie Python coder like me. There are tons to discover and it is very exciting.
In near future, I am thinking to further extend this idea, until we are able to:
- Modify the Color of Pixel using Image Processing Logic
- Creating transition animation from one pixel to the next, frame by frame like in LED animation
- How to render it out (save it to disk as well)
Continue with our Python journey ....
I was reading and studying some posts from this awesome Blender Scripting Blog by Dealga McArdle and there is one topic that is pretty interesting to me: "Pixels".
http://blenderscripting.blogspot.com.au/search/label/pixels
Dealga wrote and proposed on how we could tell Blender to draw pixels using Python. His example is quite clever and really open for interpretation. I did not get the whole thing yet, but they are interesting, especially the random pixel color it can generate.
I like to take his basic template on how to draw pixels and try to simplify further until we can draw a pixel.
I want to think in term of 2D Computer Graphics ala Design By Numbers (John Maeda) and Processing, and also NodeBox.
Basically let's explore this "Draw A Pixel" idea using Python.
DRAW PIXEL TEMPLATE
Below is the basic template from Blender Scripting blog:
import bpy
import random
D = bpy.data
width = 10
height = 10
image_object = D.images.new(name='picOut', width=width, height=height)
num_pixels = len(image_object.pixels)
# draw a dot of pixel at certain position based on the number N
# N should not be bigger than (4 * width * height)
# value can be between 0.0 and 1.0
image_object.pixels[N] = 1.0
image_object.pixels[245] = 1.0
- It tells Blender to create an image object, with the size of Width and Height specified. We use small number for now, like 10x10 grid, total number of 100 pixels.
- The way it works, apparently the image object itself contain lookup information about Red, Green, Blue, Alpha color pixel value. Which means, for 100 pixels, we are getting the a total length of 400 slots in total (from num_pixels variable).
- We can color the image object simply by putting a number in correspond to the R, G, B, A slot.
CREATING DRAW A PIXEL FUNCTION
Instead of relying to images.pixels[] function, I am thinking that we need to further break it into a function that is easier to comprehend.
I want to end up with function like this:
drawPixel(x,y, R, G, B, A)
x = coordinate pixel X
y = coordinate pixel Y
R = red value (0.0 - 0.1)
G = green value (0.0 - 0.1)
B = blue value (0.0 - 0.1)
drawPixel(i,j,value) # simplified version, greyscale output
i = coordinate pixel X
j = coordinate pixel Y
value = the value for RGBA
Let see how we can accomplish that.
PIXEL GRID
Firstly, we know that images.pixels[N] is the function we will be using to actually draw a pixel. But what we know is that the value N / the number that we specify, is an index number that is representing RGBA of the actual pixel of an image.
When we create 10 x 10 grid, we get 100 pixels. But inside the images.pixels, there are 400 index slots or 400 items. If we imagine it as a LIST, it will be something like this:
[ r, g, b, a, r, g, b, a, r, g, b, a, r, g, b, a, ..... ] for 100 times (because we have 100 pixels).
When we use the function images.pixels[N] as below:
images.pixels[6] = 1.0
That is basically telling Blender to draw a BLUE with value of 1.0 at Pixel Coordinate [1, 0] and mix it together with whatever value of RED, GREEN, ALPHA (default of 0.0).
How do I know that? From our understanding of LIST above.

(Inside Blender UV/Image Editor panel, if we LMB hold, we get information about that pixel. Above, we see information such as RGBA value and also the XY coordinate).
LIST TO MATRIX GRID

Before I got into the actual function to draw a pixel, I am researching all around on how to turn LIST into GRID ARRAY. Apparently, it is not ARRAY that I am really searching, I need a MATRIX, 2 Dimensional 2D Matrix to represent LIST as a GRID.
So, imagine we have a list [r,g,b,a,r,g,b,a,r,g,b,a,r,g,b,a .... ] that we want to turn into matrix list [[r,g,b,a][r,g,b,a], [r,g,b,a].....]
Or imagine we have a list representing coordinate 10 x 10, but as a list [0,1,2,3,4,5,6,7,8,......, 99]. Total of 100 numbers.
That list will more useful if we turn it into something like below:
That list will more useful if we turn it into something like below:
[[0,1,2,3,4,5,6,7,8,9], [10,11,12,13,14,15,16,17,18,19], .... and so on]
Which will be a more representative of (X, Y) grid. So that we can easily point the X and Y, and Python will turn that back into a number. I have few Python solutions that allow us to SPLIT a LIST into MATRIX.
FIRST SOLUTION
I got this awesome answer from Taisuke Tanimura which uses List Comprehension in Python:
##########################
# Taisuke Tanimura solution
r=1.0
g=1.0
b=1.0
a=1.0
origList = [r,g,b,a,r,g,b,a,r,g,b,a]
splitList = [origList[i:i+4] for i in range(0,len(origList),4)]
print (splitList)
##########################
SECOND SOLUTION
My solution based on eHow solution
r=1.0
g=1.0
b=1.0
a=1.0
origList = [r,g,b,a,r,g,b,a,r,g,b,a]
splitList = []
splitEvery = 4
while origList != []:
splitList.append(origList[:splitEvery])
origList = origList[splitEvery:]
print (splitList)
##########################
THIRD SOLUTION
To use NumPy, but I don't know exactly how. Google keeps pointing at NumPy.
NOTE:
While researching about List and Matrix, this is all basic stuff, I can imagine, but I found heaps of information about Python and how it can SLICE a LIST and also do the reverse like FLATTEN LIST within LIST or NESTED LIST into a single LIST. They are all new for me and very interesting.
[UPDATE 20130312: Understanding LIST & GRID]
Read further explanation by my mate, Nemui Kame regarding this kind of LIST and GRID to get a better understanding:
http://alittlegamecode.blogspot.com.au/2013/03/how-to-access-rgba-color-channel-via.html
Anyways, using the above method, we create a function below:
def grid(x,y):


    # we have 10 x 10 grid, list will contain the total of it
    origList = []

    for i in range(width * height):
        origList.append(i)

    matrix = []

    while origList != []:
        splitList.append(list[:width])
        origList = list[width:]

    return splitList[y][x]
Taisuke's Method:
def grid(x,y):


    origList = []

    for i in range(width * height):
        origList.append(i)

    splitList = [origList[i:i+width] for i in range(0,len(origList),width)]


    return splitList[y][x]
So, the function will return N number that actually represent X, Y grid coordinate. We can call it simply by using grid(x,y).
Cool. So the next thing we do is just to apply that into our next problem.
ADDING RED, GREEN, BLUE, ALPHA PATTERN INTO THE MATRIX
Since our pattern is [r,g,b,a, r, g, b, a, ....], my next quick hack solution is simply to do this:
N = red value
N + 1 = green value
N + 2 = blue value
N + 3 = alpha value
That will be how the whole list will be applicable to what we are doing.
BLENDER SUSHI SCRIPT: Draw Me A Pixel
import bpy
import random

D = bpy.data

width = 10
height = 10

image_object = D.images.new(name='picOut', width=width, height=height)
num_pixels = len(image_object.pixels)

def grid(x,y):
    # we have 10 x 10 grid, list will contain total of it
    origList = []

    for i in range(width * height):
        origList.append(i)

    splitList = [origList[i:i+width] for i in range(0,len(origList),width)]

    return splitList[y][x]

def drawPixel(x,y,value):

    # multiplied by four because of r, g, b, a pattern
    pixelNumber = grid(x,y) * 4

    # this is a quick way to iterate
    image_object.pixels[pixelNumber] = value
    image_object.pixels[pixelNumber+1] = value
    image_object.pixels[pixelNumber+2] = value
    image_object.pixels[pixelNumber+3] = 1.0

    print(pixelNumber)

# NOTE: number cannot go outside the range of image pixel width height
BLENDER SUSHI SCRIPT: Draw Me A Pixel - OPTIMIZED
AS SUGGESTED BY DEEN / updated 2013.03.13
import bpy
import random

D = bpy.data

width = 10
height = 10

image_object = D.images.new(name='picOut', width=width, height=height)
num_pixels = len(image_object.pixels)

def grid(x,y):
    return x + width*y

def drawPixel(x,y,value):

    # multiplied by four because of r, g, b, a pattern
    pixelNumber = grid(x,y) * 4

    # this is a quick way to iterate
    image_object.pixels[pixelNumber] = value
    image_object.pixels[pixelNumber+1] = value
    image_object.pixels[pixelNumber+2] = value
    image_object.pixels[pixelNumber+3] = 1.0
Thanks to DEEN in the comment below. Apparently we can get easier access to the Linear List from Matrix Grid XY by doing this: grid(x,y) = x + width*y
Much simpler. Why did not I think of that? I must have forgotten my Math!
However, doing it the long complicated way and the hard way, one learned how to SPLIT Linear List into Matrix and how to FLATTEN Matrix into List.
Keep in mind that the script will:
- Create New Image and start fresh canvas each time you run the script. You can certainly change this behaviour and tell Blender to override the same image instead, but do keep track of your image Width and Height. Remember you cannot draw outside the dimension of your canvas.
- Draw pixel on top of another pixel in sequences
Each drawing will be processed top to bottom, and every pixel will be over-drawn by next pixel.

drawPixel(6,8, 1.0)
# this will draw pixel at X,Y coordinate (6,8) and as a value of 1.0 (RGBA).

Noise pattern.

Stripe of lines drawn pixel by pixel.

Lines with Random Greyscale values.

Using 100 x 100 pixel grid.

It is starting to take a little longer to create, but still OK. The result is quite interesting.
For 1000 x 1000 grid, that will take quite a loooong time, but that is because this Python script to "Draw A Pixel" is not optimized. There must be a much better and faster way using Blender Python API.
More examples:
Using Width and Height as INPUT for the interaction

Using Random Module for colorful pixels

More examples:
Using Width and Height as INPUT for the interaction

Using Random Module for colorful pixels

MARIO MUSHROOM PIXEL ART

Check the newly created image under Image Editor. There is probably a way to change the context and to update the Image Editor screen.
DRAWING PIXEL WITH COLOR (R, G, B, A)
For the colored Pixel, I added the code below:
def drawPixelColor(x,y,R,G,B):
# multiplied by four because of r, g, b, a pattern
pixelNumber = grid(x,y) * 4
# this is a quick way to iterate
image_object.pixels[pixelNumber] = R
image_object.pixels[pixelNumber+1] = G
image_object.pixels[pixelNumber+2] = B
image_object.pixels[pixelNumber+3] = 1.0
print(pixelNumber)
Below is the code to draw MARIO RED MUSHROOM, pixel by pixel. See if you can optimize this further.
### DRAW MARIO RED MUSHROOM ###

# draw white background
for i in range(16):
    for j in range(16):
        drawPixel(i,j,1.0)

# draw mushroom outline
for x in range(4,12): drawPixel(x,0,0.0)
for x in [3,12]: drawPixel(x,1,0.0)
for x in [2,13]: drawPixel(x,2,0.0)
for x in [2,6,9,13]: drawPixel(x,3,0.0)
for x in [1,2,3,6,9,12,13,14]: drawPixel(x,4,0.0)
for x in range(4,12): drawPixel(x,5,0.0)
for x in range(5,11): drawPixel(x,15,0.0)
for y in range(5,11): drawPixel(0,y,0.0)
for y in range(5,11): drawPixel(15,y,0.0)
for y in range(11,13): drawPixel(1,y,0.0)
for y in range(11,13): drawPixel(14,y,0.0)
drawPixel(2,13,0.0)
drawPixel(13,13,0.0)
for x in range(3,5): drawPixel(x,14,0.0)
for x in range(11,13): drawPixel(x,14,0.0)

# draw mushroom inside
for x in range(3,12):
    drawPixelColor(x,6,1.0,0.0,0.0)
for x in range(3,12):
    drawPixelColor(x,6,1.0,0.0,0.0)
drawPixelColor(14,6,1.0,0.0,0.0)
for x in [2,3,12,13,14]:
    drawPixelColor(x,5,1.0,0.0,0.0)
for x in [3,4,9,10]:
    drawPixelColor(x,7,1.0,0.0,0.0)
for x in [3,4,9,10]:
    drawPixelColor(x,7,1.0,0.0,0.0)
for x in [2,3,10]:
    drawPixelColor(x,8,1.0,0.0,0.0)
for x in [1,2,3,10,11,14]:
    drawPixelColor(x,9,1.0,0.0,0.0)
for x in [1,2,3,10,11,12,13,14]:
    drawPixelColor(x,10,1.0,0.0,0.0)
for x in [3,4,9,10]:
    drawPixelColor(x,11,1.0,0.0,0.0)
for x in range(4,10):
    drawPixelColor(x,12,1.0,0.0,0.0)
for x in range(5,9):
    drawPixelColor(x,13,1.0,0.0,0.0)
for x in range(5,9):
    drawPixelColor(x,14,1.0,0.0,0.0)
Try and draw your own Pixel Art, pixel by pixel, using the code provided above and your understanding of Python. I guarantee that you will start to think further in term of making the code more efficient or how to draw faster.
Use small size Grid for now, for sake of simplicity. 100 x 100 is already quite big and the code can be slow. Try smaller grid size:
- 10 x 10
- 16 x 16
- 32 x 32
- 64 x 64
UPDATE 2013.03.14 / Saving Out The Image Files
So, you probably end up with some Pixel Art images now and want to save it? You can do that manually, but if you have many images, maybe we need Python.
Below is my attempt to write a script that will save all the Image Files: (that are currently open and displayed on Blender Image Editor)
BLENDER SUSHI SCRIPT: Save All Images
import bpy


allImages = bpy.data.images

filepath = 'C:/' # this is the root path where file will be saved


for image in allImages:

    image.save_render(filepath + image.name +'.png')

    print (filepath+image.name+'.jpg' + ' is saved!')
I figured out about the script and Python method to save the image file by using dir() on Blender Data Images object. I guess this is a good way to search for functions/methods inside an object. Surely Blender Python will have better documentation when it reaches Blender 3.0, but for now, I think this is the way to go apart from Google search or asking at the forum.

 |
| Gangnam Style 3D Pixel Art. |
REMIX THE CODE
Modify the code further and extend it as you pleased. As you may notice above, I actually do some modification by adding drawPixelColor() function. Of course the possibility is really endless.
Perhaps, you can create a QR code in Blender, pixel by pixel?
Maybe you can sample a small Pixel Art that will then create a 3D Pixel Grid all with the correct material? Have someone done that? Very possible. In fact I will just do that now.
REVERSE THE CODE
Here, we are going to "reverse" the process. This is where the fun began.
So instead of Drawing A Pixel, the code below (which I again borrowed from Blender Scripting blog) will read whatever image pixel that you open in Blender (opened in Image Editor) and then take that data back into Blender as LIST and LIST MATRIX.
Inside Blender Image Editor, open up an image. In my case it is called 'mario_musroom.png', change that name with whatever image file you have.
So instead of Drawing A Pixel, the code below (which I again borrowed from Blender Scripting blog) will read whatever image pixel that you open in Blender (opened in Image Editor) and then take that data back into Blender as LIST and LIST MATRIX.
Inside Blender Image Editor, open up an image. In my case it is called 'mario_musroom.png', change that name with whatever image file you have.
import bpy
D = bpy.data
test_file = 'mario_mushroom.png'
img = D.images[test_file]
pixels = list(img.pixels)
grouped_list = [pixels[ipx:ipx+4] for ipx in range(0, len(pixels), 4)]
print("------LENGTH------")
print( len(img.pixels)//4)
print("------PIXEL------")
print(pixels)
print("---GROUPED-PIXEL---")
print(grouped_list)
print(grouped_list[255])
Below is List of 4 x 256 Numbers, representing the pixel and RGBA values from the 16x16 Mario Mushroom image:

Below is Grouped Matrix List of 4 x 256 Numbers, representing the pixel and RGBA values from the 16x16 Mario Mushroom image:

What can you do with those data again then? Anything you can think of, actually.
You could manipulate the RGBA pixel color value and pass it back as new picture. Changing the color into greyscale, shifting the color value, create some variations of colors, and all kind of RGBA pixel color manipulation.
From Blender Scripting blog, Dealga suggested "firefly reduction" method, which is clever, kind of like "noise reduction" way of thinking.
You could manipulate the RGBA pixel color value and pass it back as new picture. Changing the color into greyscale, shifting the color value, create some variations of colors, and all kind of RGBA pixel color manipulation.
From Blender Scripting blog, Dealga suggested "firefly reduction" method, which is clever, kind of like "noise reduction" way of thinking.
We actually have good useful List of Array Matrix that can tell you the location of (X, Y) and also the R, G, B, A, so we can really filter that list and then tell Blender to create grid of xoxes with RGBA value. Although... I imagine many boxes with hundreds of materials will be quite heavy for Blender. Particle and Instance is probably better.
However, regardless of that, it is worth trying out just to further think in Python.
Let see how we can draw some boxes using the above information...
I have a little help from here in term of applying Material to newly created Cube.
UPDATE 2013.04.09
BLENDER SUSHI X SCRIPT: Import Pixel Art and Create 3D Cubes (OPTIMIZED VERSION)
BIG thanks to MageOfTheForest for optimizing the script!
import bpy

'''
This is an optimized version of Pixel to 3D Cubes script.

Credits to: mageoftheforest

Last update: April 9, 2013 at 2:08 AM

'''

# Specify your image here, open it inside Blender Image Editor panel
image_file = 'zelda_16_16.png'

img = bpy.data.images[image_file]
pixels = list(img.pixels)

# creates a 2 dimensional array from a 1 dimensional array
# by grouping r, g, b and a for each color
grouped_list = [pixels[ipx:ipx+4] for ipx in range(0, len(pixels), 4)]

# Get width and height of image (in pixel)
width = img.size[0]
height = img.size[1]

bpy.ops.mesh.primitive_cube_add()
obj = bpy.context.active_object
obj.scale = 0.5, 0.5, 0.5

mat = bpy.data.materials.new('pixelColor')
mat.diffuse_intensity = 1.0
mats = {}

for y in range(height):
    for x in range(width):
        # separate RGBA into each own variables
        r = grouped_list[x + y * width][0]
        g = grouped_list[x + y * width][1]
        b = grouped_list[x + y * width][2]
        a = grouped_list[x + y * width][3]

        # create cube at location XY
        # a new created mesh will always become the active object
        copy = obj.copy()
        copy.data = obj.data.copy()
        copy.location = (x - width / 2, y - height / 2, 0)
        copy.name = 'pixelcube.%s' % (x + y * width)

        # add material with RGB color as sampled for every pixel
        key = str(r) + str(g) + str(b) + str(a)

        if key in mats:
            copyMat = mats[key]
        else:
            mats[key] = copyMat = mat.copy()
            copyMat.diffuse_color = (r,g,b)

        copy.data.materials.append(copyMat)
        bpy.context.scene.objects.link(copy)
        print ('PixelCube {number} created at:'.format(number=x + y * width), x, y, ', with RGB color', r, g, b)

bpy.context.scene.objects.unlink(obj)
bpy.data.objects.remove(obj)

# Code for join all objects together
# Place the origin to the center and
# Remove all double vertices


'''
bpy.context.scene.objects.active = copy
bpy.ops.object.join()
bpy.ops.object.origin_set(type = 'ORIGIN_GEOMETRY')
bpy.ops.object.mode_set(mode = 'EDIT')
bpy.ops.mesh.remove_doubles()
bpy.ops.object.mode_set(mode = 'OBJECT')
'''

print('Finished')
Although I have not fully studied the optimized script in details, but above should work fine and a lot faster. The script procession will now continue running at full speed and does not slow down like below.
To do 256 x 256 grids, it will take few minutes instead of hours. Mind you, 256 x 256 = 65536 Cube with 65536 Materials. It will also consume around 1.6 GB of RAM. Not recommended.
You might also want to tweak the script above to apply color to a single material with Vertex Color Set, instead of Multiple Materials. Doing it this way is much more efficient and you can easily transfer it to Cycles.
You might also want to tweak the script above to apply color to a single material with Vertex Color Set, instead of Multiple Materials. Doing it this way is much more efficient and you can easily transfer it to Cycles.
Below is the original script to convert Pixel Art to 3D Cubes.
BLENDER SUSHI SCRIPT: Import Pixel Art and Create 3D Cubes
WARNING NOTE:
- Use the script only on small Pixel Art ( 64x64 pixel is probably already big )
- Toggle Blender System Console to see the progress printed out line by line.
- I have not optimized the script, so 128 x 128 pixels will take a bit of time (few hours?). 1024 x 1024 pixel will probably take .... few days to complete. Do not try that.
- Remember that you are creating total number of X x Y pixels. For 128 x 128 pixels, you will get 16384 boxes with 16384 materials! It is quite possible Blender may freeze run out of memory.
- For pixel art with large dimension, it is better to use UV + texture and a single material after all. But for small pixel art, sometimes I prefer each box have its own material and color.
- My Task Is: to optimize the script...
- Will try Vertex Color option for more flexibility when using Cycles.
import bpy
D = bpy.data

# Specify your image here, open it inside Blender Image Editor panel
image_file = 'mario_mushroom.png'

img = D.images[image_file]
pixels = list(img.pixels)
grouped_list = [pixels[ipx:ipx+4] for ipx in range(0, len(pixels), 4)]

# Get width and height of image (in pixel)
w = width = img.size[0]
h = height = img.size[1]

print("------LENGTH------")
print( len(img.pixels)//4)
print("------PIXEL------")
print(pixels)
print("---GROUPED-PIXEL---")
print(len(grouped_list))

# Create LIST of GRID XY value
rowColList=[]

for i in range(height):
    for j in range(width):
        rowColList.append(i)
        rowColList.append(j)

# SPLIT the LIST of XY
origList = rowColList
splitList = [origList[i:i+2] for i in range(0,len(origList),2)]

for number in range(len(grouped_list)):

    # separate RGBA into each own variables
    r = grouped_list[number][0]
    g = grouped_list[number][1]
    b = grouped_list[number][2]
    a = grouped_list[number][3]

    # separate XY coordinate
    x=splitList[number][0]
    y=splitList[number][1]

    # create cube at location XY
    bpy.ops.mesh.primitive_cube_add(location=(x-width/2, y-width/2, 0))
    selectedObject = bpy.context.selected_objects
    selectedObject[0].name = 'pixelcube.%s' % number
    selectedObject[0].scale = 0.45, 0.45, 0.45

    # add material with RGB color as sampled for every pixel
    mat = bpy.data.materials.new('pixelColor')
    mat.diffuse_color = (r,g,b)
    mat.diffuse_shader = 'LAMBERT'
    mat.diffuse_intensity = 1.0
    #mat.emit=0.5

    bpy.context.object.data.materials.append(mat)

    print ('PixelCube {number} created at:'.format(number=number), x, y, ', with RGB color', r, g, b)

NOTE:
The actual sampling of image information in Blender is flipped horizontally, so maybe the resulting cube needs to be flipped manually. Or we can change the code to flip the axis.

The actual sampling of image information in Blender is flipped horizontally, so maybe the resulting cube needs to be flipped manually. Or we can change the code to flip the axis.
 |
| Image is flipped when read back. |
With this setup, we actually have Cubes for each pixel and each one of them is colored properly. We can apply Blender Rigid Body Dynamic to it like below if we like.

Of course you are not limited to 3D Cube shapes, you can also use other 3D Primitives or even Suzanne. Simply switch the Cube with other shapes and see how it looks.
NOTE:
Again I have not yet optimized the script further, unlike what Dealga has been exploring and get into conclusion on his website. So please do your own reading maybe you can improve the script yourself.
http://blenderscripting.blogspot.com.au/2012/08/adjusting-image-pixels-internally-in.html
Check also Dealga's script "Firefly Removal".
I will certainly do some updates whenever I understand something new.
NOTE:
Again I have not yet optimized the script further, unlike what Dealga has been exploring and get into conclusion on his website. So please do your own reading maybe you can improve the script yourself.
http://blenderscripting.blogspot.com.au/2012/08/adjusting-image-pixels-internally-in.html
Check also Dealga's script "Firefly Removal".
I will certainly do some updates whenever I understand something new.
ALTERNATIVE WAY TO RENDERING IT OUT
Use a number of array grid of boxes as you like and then color it using the Cycle material using Object Info Node. Doing it this way is the fastest to map the 2D texture. Using it this way, you get Pixel Colors that is more interpolated.


Back to Pixel business, try if you could further enhance the code (if you do, please let me know and do give comments below), and make Draw functions such as below:
- drawLine()
- drawCircle()
- drawSquare()
- drawEllipse()
- drawRectangle()
See how you would plug in function like Sine and deal with Float value when the grid is expecting Integer value. Things like that. Even I have no idea how to do it.
DEEN: (quoted from his nice suggestion on the Comments down below)
"... before investing time in creating drawLine, drawEllipse, etc, see if you can't use one of the existing Python image manipulation modules for that purpose, like PIL, or pyCairo, etc. I'm reasonably sure you can do drawing in PIL and then transfer the data to the Blender image pixel array in one go."Perhaps you could further learn and expand this kind of idea using from awesome tools such as:
- John Maeda's Design By Numbers
http://dbn.media.mit.edu/ - Processing by Ben Fry and Casey Reas
http://processing.org/ - NodeBox / NodeBox 2 / NodeBox 3
http://nodebox.net/
More Pixel stuff from Processing perspective:
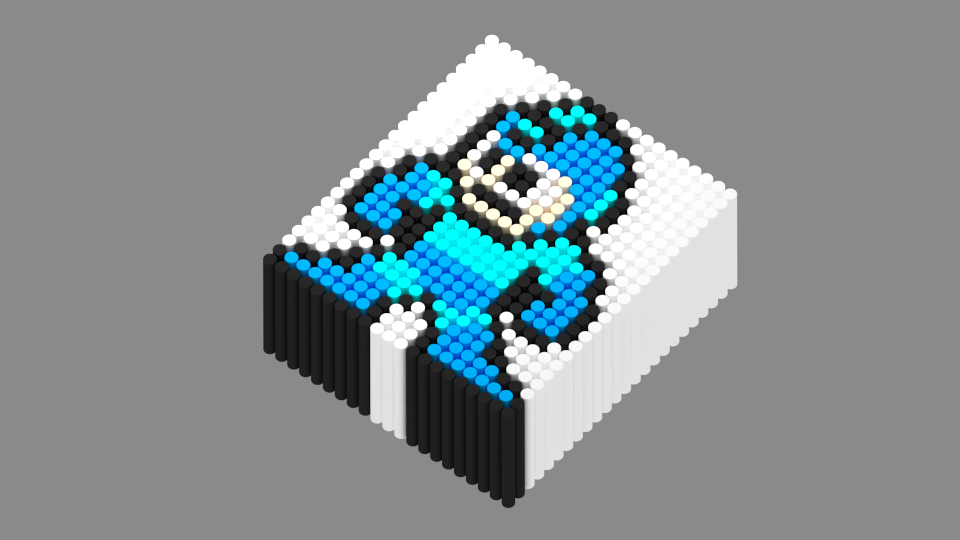 |
| Megaman rocks. |
BONUS 2013.03.13 / Video Tutorial On How To Use The Scripts

PIXEL ART IN BLENDER, THE TRADITIONAL WAY...
If you prefer to do it in more traditional way, you can of course use Blender Paint mode. Remember to draw pixel art in a small canvas and a single pixel Brush.


BONUS INSPIRATIONS

Rendering "pixel" look using Blender Freestyle and disabling Antialiasing by Peripheral Games:
Pixelated Animal Sculptures by Shawn Smith
Laura Bifano // PIXELATED
http://www.emptykingdom.com/sfw/featured/laura-bifano-2/
ILP (Important Looking Pirates) // Advertisement
https://vimeo.com/61357044
GREAT PIXEL ARTISTS
http://hussinger.blogspot.com.au/
ILP (Important Looking Pirates) // Advertisement
https://vimeo.com/61357044
GREAT PIXEL ARTISTS
http://hussinger.blogspot.com.au/
For more 3D Pixel and Voxel posts, search the particular topic at Blender Sushi.
http://www.joesfer.com/?p=149
FUTURE CHALLENGE FOR MYSELF AND YOU
Color Stippling Effectshttp://www.joesfer.com/?p=149


