Dynamic Human Array using Dynamic Paint. Rendered using Blender Freestyle.
VIDEO DEMO
THE PROCESS
0. Prepare 3D Model from Make Human
1. Rig and Control using Mixamo Auto-Rig in Maya
Since I just need a quick dummy rig, I quickly use Mixamo free auto rig (for under 10000 tris model) and download it into Maya. Thanks to Mixamo.
2. Pose and Animation in Maya
I have to rely on Maya with rigging and animation. I have been using Maya for rigging and animation in the past 10 years, so please pardon me.
Eventually I will produce everything using Blender. I can see that Blender has nice auto-rig and plenty of rigging tool, but it takes time.
3. Export animation into Blender using MDD Mesh Cache.
MDD Mesh Cache Modifier is super handy. Animation Cache import from Maya is a breeze.
4. Setup Dynamic Paint Array using Python in Blender
Let Python do the job of connecting Drivers.
5. Animate Human Array in Blender
I realized that with this setup, we are really using a lot of RAM and processing power. Blender handles it quite well and the effect is still interactive.
I need to think of optimization. Obviously few millions of moving vertex with 6 GB will be a bit slower. Need more RAM.
Have you ever wished that you can Cut and Slice a 3D object using Cutting Plane of some sort in Blender? Let's explore on how this can be done in Blender.
MAYA POLY CUT FACES TOOL From someone coming from Maya background, I have another wish that Blender has Maya feature to do Poly Cut Faces Tool (polyCut node). Basically a function to be able to slice and cut any mesh using Cutting Plane. I am sure this can be done in Blender.
Maya Poly Cut Tool slices like Fruit Ninja.
To further describe this "cutting" function, we can observe slicing games such as:
BLENDER KNIFE TOOL In case you don't know, there is actually a Knife Tool (K) in Blender that allows user to Cut Slice 3D mesh in Edit Mode. Blender Knife Tool is one of the best out there. It slices through everything (front and back faces), if you hold Z while using the Knife Tool.
Now, I will propose a strange method that you can use to simulate Maya's Poly Cut Tool in Blender to slice and cut through 3D mesh.
What is the trick? The almighty Blender Boolean.
How does it work? Let's take a look by an example.
1. Start with the default Cube and a Poly Plane.
Make sure that our "cutting plane", the Poly Plane geometry really cutting through and covering the area you want to slice.
2. Apply Boolean Next, we just apply Boolean Modifier (Difference) to minus the Poly Cube - with Poly Plane:
We get 1/2 cut of the Poly Cube. You see how interesting that Blender understands and respects the Plane Face normal and giving the result like above:
Poly Plane Face Normal and Boolean Result respecting the normal.
3. Duplicate the PolyCube + PolyPlane + Boolean and Flip the "Cutting Plane" Now, we will do a simple hack here, we will duplicate the Poly Cube + Poly Plane with Boolean Difference (while the modifier is still live).
The result will be the exact same thing. Unless, we actually reverse and flip the normal of "cutting plane". And so we get something like below:
If the Boolean Modifier is applied to both 1/2 slice of the cube, we will get exactly what we want, I will give color to both slices so you can see exactly what just happened:
This is exactly what we want! Super easy, right?
THE LIMITATION: The limit of this method is solely depending on Boolean result. If the object to be cut and slice is made of multiple objects, then the cutting and slicing won't work. Better off slicing and cutting on just a single mesh and then re-join them again later.
ALTERNATIVE WAY OF CUTTING, GREAT FOR MULTIPLE CUTS
We can actually use a Plane with very tiny amount of thickness that will result it both side of cuts at the same time, instead needing to duplicate.
Blender Boolean is pretty stable and powerful in this case that it will "slice" and "cut" even when the thickness of reference Boolean is very tiny (value like 0.0001).
So, for our "Cutting Plane" (Poly Plane) we simply extrude it with a super tiny value that our eyes cannot see.
Then, we use it with Boolean Modifier to cut slice our object.
As you can see it works great with multiple cuts. Below is example on how the Boolean Modifier got stacked. Don't attempt to join the Cutting Plane and do a single cut. You better off doing multiple Boolean Modifiers this way. For simple and evenly distributed Cutting, you can use Array Modifier to the "cutting plane".
Doing it manually is pretty simple, just click on Copy and replace the Slicer object. Here is the resulting cut pieces after we also click Apply on every Modifier, one by one. We will script this later, I promise.
Randomize each pieces using my previous script that gives random color on selected objects.
Especially nice if we then apply Blender Bullet Physics. This is obviously less cool than Blender Cell Fracture (Voronoi shatter), but still useful in some case, especially if like to specifically Cut and Slice objects.
LIMITATION: When the object is too complex, it is possible that the Boolean failed. Fox example, if mesh to be cut and slice has holes like Suzanne eyes, or made of multiple pieces.
However, regardless of limitation, the use of Solidify Modifier and Array Modifier for Poly Plane (Cutting Plane) and Boolean Modifier for the object to be sliced is actually quite robust and procedural. The effect is live and you can cut and slice and adjust it and see the result right away, what else can we ask?
AUTOMATING THE PROCESS USING PYTHON
Below scripts will automate the process of Cutting and Slicing for you.
BLENDER SUSHI SCRIPT: Convert selected Planes into Boolean Cutting Planes
""" Auto apply Boolean Modifier for cutting and slicing.
Copyright (c) 2013 Jimmy Gunawan at Blender Sushi Blog Name: Name of the script Version: 001 Author: Jimmy Gunawan Contact: blendersushi@gmail.com Date Created: 2013.05.02
How to use the script: 1. Prepare some Poly Planes in which you already apply "Solidify Modifier" as your cutting planes. 2. Select all the Cutting Planes, and your Mesh (to be cut) last. 3. Run the script to connect every Cutting Planes to the objet.
"""
import bpy
# Get all selected except Active Object slave_objects = (bpy.context.selected_objects)
# Get Active Object master_object = bpy.context.active_object
# Iterate each newly created Modifier to point to corresponding slave objects
for num, slave in enumerate(slave_objects[:-1]): print(slave.name) bpy.context.scene.objects.active = master_object bpy.ops.object.modifier_add(type='BOOLEAN')
BLENDER SUSHI SCRIPT: Quick Apply Modifiers If you then want to Apply all Modifiers, you can quickly do that by selecting the object with Modifier stacks, and then run the script below:
'''
Quick script to apply all modifiers of currently selected object(s) ''' import bpy def applyModifier(): # Get list of currently selected objects selected_objects = bpy.context.selected_objects for object in selected_objects: # Make object in the list as active one by one bpy.context.scene.objects.active = bpy.data.objects[object.name] # Get all current object modifiers current_object_modifiers = bpy.context.object.modifiers # Iterate every modifier of current object for modifier in current_object_modifiers: print(modifier, 'is deleted') bpy.ops.object.modifier_apply(apply_as='DATA', modifier="{modifier_name}".format(modifier_name=modifier.name)) applyModifier()
BLENDER SUSHI SCRIPT: Auto-Random Cutting and Slicing of Selected Object(s)
<< SCRIPT COMING SOON>>
WISHLIST: Actual Cut Face/Cut Plane Tool
I think, it is possible for Blender to have Cut Plane Tool that work more like Knife Tool. Maybe a more experienced Blender Developer can create such tool.
For now, this easy and fun hack will work fine for us.
ABSTRACT CUBISM ART
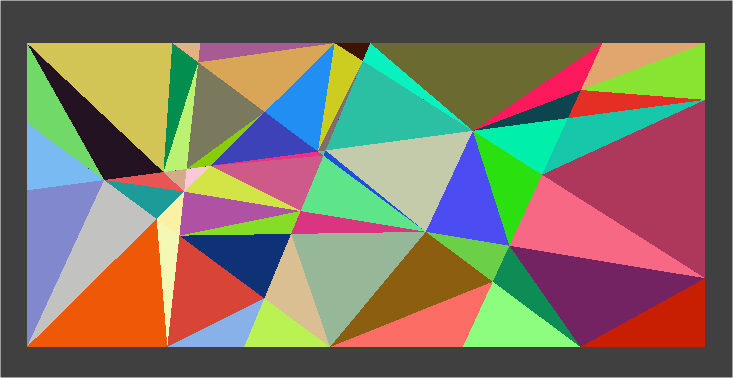
The reason I am writing this article on Cutting and Slicing is because one of my students Goreisha, asking me how to create Abstract Cubism Art using Adobe Illustrator. The Abstract Cubism that she wanted to create resembles slicing of planes into triangles pattern (Delaunay triangulation).
I told her it's probably easier to do using Blender in 3D.
Well, of course with Illustrator, we can use some random lines and Pathfinder tool to do something like Boolean but in 2D. And then maybe with some scripting, Illustrator can randomize the Fill Color of each pieces. But it is a pain to do, I imagine.
Anyhow, I think it is much more flexible to do it in 3D and render it out, everyone agree? We can have all kind of beautiful renders by adjust light and materials.
Random RGB abstract cubism.
Random HSB abstract cubism.
Remember the RGB vs HSB thing that I have mentioned in the past? HSB Hue variation is more pleasing to the eyes. Of course, you can also specify a bunch of color that Blender can sample and then apply in random fashion.
This is for my student "wallpaper design", so we can be random about the slicing. In the future I will think on a way to actually create a more interesting Cubism Art based on photograph or something.
CONVEX HULL Probably not directly related, but it is still about messing around and remeshing around with mesh and Nicholas Bishop "Convex Hull" implementation in Blender is super interesting for me.
FURTHER CHALLENGE: Delaunay Triangulation? Thinking about creation of Delaunay Triangulation Pattern on a Mesh, I actually always wanted a kind of Modifier in Blender that does pattern slicing and cutting based on Particles and scattering of Points, which should result in Delaunay Triangulation.
Maybe we can actually create something like that via Python scripting. Anyway, I will save that for future. Maybe Blender developers interested to add this feature.
Not sure 100% what I am looking for, but I just like the idea to Remesh as Delaunay.
Bunch of Cubes from Maya, imported into Blender (Color, Position) via XML and dynamically animated using Blender Bullet and rendered out.
PREREQUISITE
Python basics
Python data type, especially Dictionary
cElementTree module
File Read and Write
We will be looking at a bit of theory of XML and its practical usage.
PROGRAMMING AND DATA
The more one learns about programming in Python (in Blender or other 3D packages), the more one can see the pattern that the whole thing is really about "data management" and "data processing" and "data visualization":
How to retrieve data
How to process data
How to store data
How to export and import data
How to display or present the data
As "boring" as those may sound for artists at first, data is apparently can further be processed and presented elegantly in a creative ways. Lots of raw data just means more opportunity for us (artists) to visualize it in a beautiful kind of way.
3D artists (like you and me) are lucky from the very beginning to work visually with computer data from the very beginning (at least in the last 20+ years). All we have to deal is the Interface. Still there is a sweet and sad labor of hours in doing what you are doing :)
However, if we really want to dig deeper with Computer Graphics, it is nice to be able to read raw data and process them in a magical kind of way.
In this post, I will be attempting to do an introduction to XML, XML Writing and Reading. I am not from programming background and writing this post is quite strange to myself as well. Anyhow, I feel like writing and sharing with you all.
IT WAS CSV
I have written a bit about CSV (Comma Separated Value) data and Blender export-import using CSV a while ago. At the time I was still clueless about Python and programming. I felt that CSV is really simple and easy to understand so that was my reason to use CSV.
Sooner or later we will realize that CSV is probably limited in term of what we can "store" and "parse" from it. It does not have much of STRUCTURE apart from a long list of strings and numbers and line numbers. It can represent ROWS and COLUMN type of data, but not so much of HIERARCHY data.
The simple way I see XML is a kind of data format with tree-like hierarchy structure. XML is human readable, just like CSV, but when we look at the XML data, it is more like a Tree with Branches and Leaves.
root node, child node, grand child node, and so on. it always has root.
tag
element(s)
attribute(s)
attribute value(s)
text
If I continue on digging on XML data structure without some examples probably we all can go to sleep. But I will try show you some interesting things soon.
Since XML itself is a little boring to look at and actually does nothing, why do we even need to look at this? One would rather spend time doodling inside Blender already!
Be patient, my friend.
Apparently the data stored in XML structure is easily accessible via Python, just like collection of Dictionary and List. It is a lot like Library actually.
This means with XML, we can easily WRITE OUT and READ IN data. And this is a cool way we can TRANSFER DATA between any software packages or tools that supports Python. We can make them talk to one another as we can see soon.
The data inside could be anything and we can organize the data the way we like it, because with XML we can create our own custom "tags" and store the data the way we like within the XML structure.
I reckon that the complex XML is more "correct", but then the simple XML, the single liner that can be accessed as Dictionary is sufficient for us most of the time. It is really up to us how we like to store and organize the XML.
PS: Shaun Friedberg suggested the simple XML structure. Shaun is actually the one introducing me to this XML stuff (in Maya).
CREDIT NOTE: Originally some of the contents I talked about in here is from the Python course taught by Shaun Friedberg http://www.linkedin.com/in/pyrokinesis
WRITING XML (EXPORT XML DATA)
Whatever value we can print() in Python, we can easily pass that as XML lines.
We could type the XML lines by hand manually, but that is silly and we definitely will not do that unless we are a robot. We could of course edit the XML by hand too if we like, but that is also something we don't usually do.
We certainly use Python and LOOP to write XML.
Some module to help writing and parsing XML:
ElementTree
cElementTree
dom
It will be beneficial if you search and study some Python example to write and read XML using the above modules. In our case, we will be using cElementTree, because it seems to be the fastest.
BLENDER SUSHI SCRIPT: Writing Out XML Doodle Script
'''
Preparing XML construct and Writing out XML
Based on teaching by Shaun Friedberg
Edited by Jimmy Gunawan (Blender Sushi)
'''
from xml.etree import cElementTree as ElementTree
# PRETTY PRINT # function to pretty print the XML code def prettyPrint(element, level=0): ''' Printing in elementTree requires a little massaging Function taken from elementTree site: http://effbot.org/zone/element-lib.htm#prettyprint
''' indent = '\n' + level * ' ' if len(element): if not element.text or not element.text.strip(): element.text = indent + ' '
if not element.tail or not element.tail.strip(): element.tail = indent
for element in element: prettyPrint(element, level + 1)
if not element.tail or not element.tail.strip(): element.tail = indent
else: if level and (not element.tail or not element.tail.strip()): element.tail = indent
Reading data is much simpler than writing. Well, at least it seems so. Writing data seems to be more complicated at first glance.
What we need to care is what we are going to do with the data after being exported. We also need to do some Data Conversion sometimes because all the data seems to come in as String, where sometimes we need data as Integer or Float for further processing.
The data comes in as Dictionary type of data. Hopefully you have some understanding of Dictionary in Python. I am also still new to all this and it is a matter of getting the KEY and VALUE from each ITEM per ELEMENT.
BLENDER SUSHI SCRIPT: Reading In XML Doodle Script
import bpy
from xml.etree import cElementTree as ElementTree
xmlPath = 'C:/pythonInBlender/mayaOut.xml'
xmlRoot = ElementTree.parse(xmlPath).getroot()
def createMonkeyFromData():
for element in xmlRoot:
objectName = element.tag
if 'translateX' in element.keys():
#print( 'Attribute called TranslateX: {name}'.format(name=element.get('translateX')) )
import bpy

from xml.etree import cElementTree as ElementTree


xmlPath = 'C:/pythonInBlender/mayaOut.xml'

xmlRoot = ElementTree.parse(xmlPath).getroot()


def createMonkeyFromData():

    for element in xmlRoot:


        objectName = element.tag

        if 'translateX' in element.keys():

            #print( 'Attribute called TranslateX: {name}'.format(name=element.get('translateX')) )

            locX = float(element.get('translateX'))

            locY = float(element.get('translateY'))

            locZ = float(element.get('translateZ'))

            bpy.ops.mesh.primitive_monkey_add( location=(locX, locY, locZ) )


createMonkeyFromData()
BLENDER XML BUILDER? There is a script called xmlbuilder.py inside Blender, I am curious what this actually does. I will check this when I have time. Or you can check it. Maybe it is something to do with DAE (Collada) in Blender.
In the mean time, I will use the WRITING XML and READING XML construct like above.
CASE STUDY: Maya to Blender via XML
Comparison of Python in Maya and Blender I have to admit that Maya provides a lot more (shortcut) commands that allow users to quickly get ATTRIBUTE or VALUE data from one object (or node in Maya).
A little bit information: At the current state, Python in Maya is well-known as "Wrapper" of MEL (Maya Embedded Language) programming. MEL has been there in Maya for years, before later Python came in.
MEL scripts itself has hundreds of handy scripts to access all kind of data from nodes. But, even so, Python handles "Strings" and "List" like in a really awesome ways, and this makes writing script is surprisingly easy and data flow is becoming a breeze in Maya.
It will be a little weird for people learning Python in Maya because they have to always look at the MEL first. They need to kind of learn MEL too, at least to really understand the functions and reading the history.
There is PyMEL from Luma Pictures that allow for more Pythonic way to access data, kind of the more correct way Python should implemented in Maya. This is more like how Python in Blender works. It is all Object Oriented (OOP).
There are some Python API that allows to access some Maya's core that normally only accessible using C++ programming. But it is pretty complicated and low level and I am not familiar with those yet.
I am still new to Python in Blender and Blender BPY stuff and still getting familiar with the construct. I am definitely not 100% sure with a lot of things BPY. Meaning, I have a lot of questions regarding the API itself.
Like I said earlier, it seems to be much easier to access DATA inside Maya.
Examples of some handy "commands" in Maya:
List
Select
Get Attribute
Set Attribute
Connect Attribute
List Attribute
xform
Blender Python "does not" come with all those kind of commands. BPY feels more "raw" in my opinion.
Users may actually write their own COMMANDS that can mimic all those handy tools that are given from Maya commands.
In Blender, you are accessing the data and value more directly. In Maya, they give some commands to access the data and value in more handy kind of way.
Exporting data From Maya To Blender using XML Let's take a look at example that I tested the other day.
I am inside Maya and I have 3000 cubes created using Python in Maya, which was based on 3000 Particle POSITION and COLOR. The Particle itself inherited its Colors from Procedural RAMP texture.
In Maya, it is super easy to query ANY Attributes and Values of Particles, including custom attributes per Particle that user created.
In Blender, we can also easily get Particle Attributes such Position, Size, etc. but still pretty limited at the current state. Blender unfortunately cannot access Particle Color by its index. Not at the moment, but I think pretty soon in the future. Fingers crossed.
EXAMPLE: Blender Particle, get position, create cube at position For example, if I want to create some bunch of cubes at Particle Position, we could so something like this:
import bpy obj = bpy.context.active_object ps = obj.particle_systems.active #ps.particles[0].location def printPosition(): for i in range(len(ps.particles)): location = ps.particles[i].location print(i, location) # Create Cube At Position bpy.ops.mesh.primitive_cube_add(location=(location[0], location[1], location[2])) selectedObject = bpy.context.selected_objects selectedObject[0].name = 'pixelcube.%s' % i selectedObject[0].scale = 0.45, 0.45, 0.45
Now, the reasons I am doing the XML data export from Maya to Blender are below:
Because I want to get more familiar with Python and XML data export import
Because Maya's Bullet is currently sucks. It is very limited and slow.
Because Blender's Bullet is awesome and fast.
Because I am thinking of Pipeline where Blender can be the Renderer, Compositor, etc. And I like the practical Blender Fire and Smoke and some more VFX things.
And so I wrote script that does the exporting of some specifc datas from some nodes (every objects in Maya is nodes).
Basically from the 3000 cubes, I exported the COLOR RGB information. That is what I need. I could export the POSITION data as well, but for that I actually just use DAE Collada. Same thing.
How example XML data from Maya looks like:
Simple Tree View in Chrome
The actual XML Data
Importing data Into Blender From Maya using XML As the data is now "outside" of Maya as XML, we can do anything with it.
I bring the 3000 cubes from Maya as Collada DAE, Blender import them fine with the node names in tact and including Material that was set in Maya. Make sure the Unit Size is checked.
I wrote the script below to READ the XML data.
XML, Dictionary, Strings XML, when imported will come as Dictionary type of data. And it is also STRING type of data. I imported the RGB like this "[0.124, 0.55, 0.123]" and they are strings. Where the data expected supposed to be 3 values of Float.
In my script below, I have noob attempt to convert 3 values string into 3 values float.
BLENDER SUSHI SCRIPT: Importing RGB via XML (but you need to setup the XML)
import bpy # import xml.etree.ElementTree as ET from xml.etree import cElementTree as ET
def applyColor(object='pCube999', rgb = [1.0,0.0,0.0]): # Get specific object object = bpy.data.objects[object]
# Create new vertex color object.data.vertex_colors.new()
# Get Total Length of Vertex Colors for each selected meshes totalVertCol = len(object.data.vertex_colors[0].data)
# Iterate over every mesh vertex color and give it a single colour for i in range(totalVertCol): object.data.vertex_colors[0].data[i].color = rgb
filepath = 'C://xml//test.xml' tree = ET.parse(filepath) root = tree.getroot()
print(root.tag)
# root = ET.fromstring(country_data_as_string)
for child in root: # Get node name nodeName = child.tag
# Get Dictionary (including key and value) dict = child.attrib
Thanks again to Taisuke Tanimura and his magic of list comprehension, there is a better way of doing that 3 values String RGB into correct 3 values FLOAT:
rgbList = [float(token) for token in rgbVal[1:-1].split(',')]
This is a kind of old trick that I might or should have shown to you sometimes in the past. I apologize if I was repeating the technique a little bit, but I think I will do it again anyway.
I think I can further expand the idea on how to distribute and position objects along Curve path:
The Procedural / Semi Manual Way
The Blender Python Way
This is probably the accumulation of some techniques that I have written in the past. It is like doing the same thing, but think of it in more sophisticated way.
"Position Along Curve" inside Maya
I have to show you this first, so you have better idea on what I am trying to do inside Blender.
There is this once-off-tool-function in Maya that allows user to position bunch of selected objects nicely along the active curve. This tool is actually build in Python:
I feel challenged to translate this Python tool from Maya for Blender using Blender Python. I have to look around first to see whether somebody out there already create it, so far I could not actually find it.
I thought this tool is very handy, but also a little bit stupidly implemented in Maya because it only does it in non-procedural way. The tool does the job, but it does not even have the option to align the object based on the direction of the curve.
Of course I am sure it is possible to create a setup in Maya where things can be more procedural and the effect is alive, but it does not come out of the box.
One thing though, Maya has nice Rebuild Curve, that simply does the job of resampling and rebuilding curve. Even so, Houdini actually does this kind of thing better with its Resample node.
Maya Rebuild Curve
Houdini wins in this case. There is no simpler way of curve resampling than how Houdini does it:
Houdini Curve Resample
I really think Blender needs Modifier that does this LIVE Curve Resample exactly. Hopefully in near future. It's my wishlist for years. Otherwise someone needs to come up with one whether it is in form of Python Script or Modifier.
Although Blender has Simplify Curve add-on, but it is not sufficient.
SORRY, THIS IS NOT "TANK THREAD" TUTORIAL
You may think that this is how to do Tank Thread tutorial using:
Array Modifier
Curve Modifier
Curve
No, this is not "Tank Thread" tutorial. But do Google for "Blender Tank Thread" tutorial, it's pretty cool and the effect is LIVE. It is a way you can place an array of duplicated objects (normally same object) along a curve just like Tank Thread.
The resulting curve is of course not very efficient, often too dense.
Perhaps you want to Simplify Curve (activate it from Add-On) first. We don't worry about even spaced Resampling for now. We just want a simpler looking Curve.
3. Simplified Curve
The result of Simplify Curve tends to be slightly smoother, which is nice. The simplified curve does not have evenly distributed points though.
4. Duplicate Objects using DupliFrame Now, we like to have a Dummy Object as our placeholder where we like to Position Objects Along Curve at later stage. Our Dummy can be just a scaled Cube for now. We will replace it with A Single Vertex later.
You should be able to do this by following the Wiki. Make sure:
Curve Scale is applied, otherwise the Object that is Parented and DupliFrame is gone crazy and disappear from the 3D scene.
Object to DupliFrame needs to also be reset to origin and placed at the Start of Curve.
Speed option under DupliFrame is turned off
Path Animation is turned on under Curve Tab.
DupliFrame total frame number matches the Path Animation total frames.
So you got something like below. Easy.
32 frames DupliFrame, Follow ON
You can also have something like below, if you turn off the Follow option.
32 frames DupliFrame, Follow OFF
At this stage, you can do Resampling as you pleased.
64 frames DupliFrame, Follow ON
5. Switch Data You can switch the Data of the object into something else, like Suzanne (Suzanne is always a good reference for object orientation) if you like:
However, for our purpose in distributing and positioning bunch of Objects along Path, we do not really need to worry about that.
6. DupliFrame A Single Vertex I always think the way Blender handling Single Vertex is pretty awesome. Almost like Point in Houdini. A single vertex of Polygon in Blender is regarded as a real thing.
Turn your DupliFrame duplicate objects into a Single Vertex.
Although we lost the "procedurality" of being able to change the sampling, this is also the step when thing gets exciting.
You are probably already guessing where I am going with this. BLENDER MANUAL CURVE RESAMPLE:
If you connect the dots (Vertex) in order, as Edge (select 2 vertices and tap F), you are going to end up with a Curve that with even space sampling.
Instead of doing it manually, we can use Python for that:
import bpy ### 1. GET VERTICES POSITION IN 3D ### ob = bpy.data.objects['myVerts'] # assuming there is an object named "myVerts" verts = ob.data.vertices vertData = [] for vert in verts: print(vert.co) vertData.append(vert.co) ### 2. THE RE-CONSTRUCTION OF EDGE MESH ### scn = bpy.context.scene # Create Mesh Data myMesh = bpy.data.meshes.new('myMesh') # Passing some XYZ data for Vertex Location #vertData = [(0,0,0), (0,4,0), (4,4,0), (4,0,0)] # Connect pair of Vertices data as Edges based on list order of vertices edgeData = [] a=[] b=[] for number in range(len(vertData)-1): a.append(number) b.append(number+1) edgeData = list(zip(a, b)) faceData = () # Finally putting all the information together into Mesh Object myMesh.from_pydata(vertData, edgeData, faceData) meshOb = bpy.data.objects.new('myOb', myMesh) scn.objects.link(meshOb)
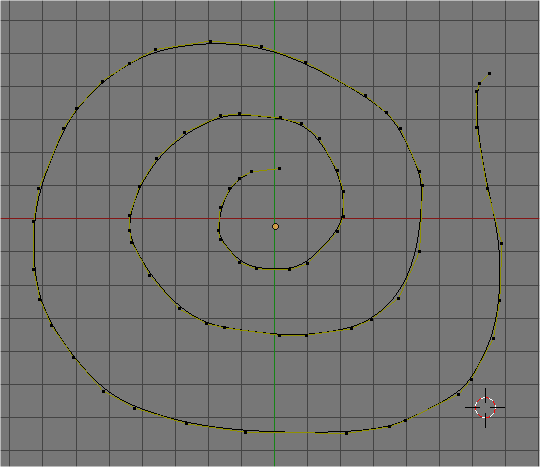
Grease Pencil Stroke (convert to dense Curve)
Simply Curve
Dupliframe a single vertex within certain distance
Connect the Dots (connecting points using Python), assuming the point is in order (it should be)
Apply Skin Modifier
However, we does not stop there. We will continue and use Blender Particles to easily do the BEADS like distribution, this is piece of cake since we already have nicely distributed Points.
BLENDER POSITION ALONG CURVE (THE SEMI PROCEDURAL WAY)
7. Blender Particles and Instances to Distribute Objects We learn in the past that Blender Group can be used as Instance object for Blender Particles, which is really cool in itself.
We simply create some beads for example, I will do my usual Colorful Beads:
Group the Beads in order and then Instance it to the Points, I will highlight all the important values you need to change:
So you get something like this:
You can activate Instance Random and play with the Seed Value of course:
Those guys instanced are really Particles, so you can play around further with that and the Instance will follow. What is cool is that you still have control over the Object being distributed along curve Path.
8. Particle Instance Modifier for other object The Point Cloud mesh that is emitting Particle and distributing Group of objects still have Vertex Normal information along curve. This can be proved if you actually apply Particle Instance Modifier into another object, like Monkey for example:
The original Particle Orientation can be adjusted. Although limited.
What would be nice is to be able to do all that directly by using Python. This is definitely a really good Python exercise to do because it will be involving LIST and SLICE.
POSITION ALONG CURVE & REBUILD CURVE IN BLENDER USING LOOPTOOLS GSTRETCH X GREASE PENCIL COMBO
(THE HACKY BLENDER SUSHI WAY)
Knowing the method above, we can probably use Blender Python script tools out there that does similar kind of thing.
GStretch does the thing that I wanted, which is to "evenly place position of points on Grease Pencil". I will probably study the Python script of this GStretch and found out how Crouch does it.
Anyhow, I am using GStrech (feature of Loop Tools) like this: 0. Make sure you already install and run Loop Tools Add On from User Preferences.
1. Draw a line and give it subdivision numbers that you like, the total subdivision will account as the "Curve Sample". For example:
A Line (with 2 vertices) = 1 Edge Sample.
A Line (with 2 vertices), subdivided cut 10 times = 11 Edges Sample, 12 vertices
A Line (with 2 vertices), subdivided cut 32 times = 33 Edges Sample, 34 vertices
Let's try small number like 10 Cuts of Subdivision for now:
3. Now, quickly draw your Grease Pencil freehand stroke as you like anywhere in 3D space.
4. Next, while still in Edit Mode and having all the vertices selected, simply call GStretch function by tapping Space and find GStretch.
5. Magically the selected Line Vertices will snap evenly along the Grease Pencil!
6. Now, it is easy to place some objects evenly spaced along the Curve! (using DupliVert or Particle Instancer for more sophisticated arrangement)
Here is video tutorial for this hacky technique:
NOTE:
Watch out for the Vertex Orders of line. You probably want to Sort the Vertex Point orders of the Line before doing this so that your placement of objects is exactly as you want.
This way will work, but it is hacky and require some strange procedures. I supposed the best way is to just use Python Script.
Additional Explanation from Bart regarding GStretch in LoopTools:
The basic methodology of GStretch is the following: getting the user input, which consists of some connected selected vertices and a grease pencil stroke. It does some checks to match up which vertices will have to go to which stroke, as it accepts multiple simultaneous inputs, but you do not need to be worried about that. It then calculates the total length of the grease pencil stroke (simple math, using the coordinates of the stroke points) and creates a list with the cumulative distance from the start to each stroke point. For each vertex, the relative position along the stroke is calculated (e.g. 10%). Using the list of cumulative distances it determines between which two stroke points the vertex will need to be moved to and how far along that line. It all sounds a bit abstract, but I would suggest studying the functions "gstretch_eval_stroke()" and "gstretch_calculate_verts()".
The basic methodology can be adapted to many situations, for example to evenly spreading objects along the curve, instead of single vertices.
UPDATE 2014.03.12:
On the note of SPACING vertex along currently selected Vertex, along Path, you can also use the Space function of LoopTools.
Smoothing and resampling is slightly more tricky. You would have to calculate a curve through the stroke points, probably using some kind of resolution parameter and a non-linear least squares regression. It's possible, but it's probably easier to use Blender's built-in methods for that, or do some object type juggling. E.g. grease pencil -> mesh -> smooth (or relax) -> curve -> grease pencil.
Thanks to Bart Crouch and his awesome LoopTools//GStretch!
If we just want that, we can have it right away. But this is too simple, not much of options and the result is just newly created polygon boxes position along the curve (Vertex/Point positions).
We can modify the Python script above so that it will:
Place bunch of user selected objects into their new position along Curve Path. The objects could be the same total number or less. Blender should repeat and duplicate the list of objects if required.
Create bunch of objects in a LIST into the Curve Path (which is now simply Vertex/Point positions)
Randomize or reorder the LIST using Python
Aligning the objects in the LIST based on Normal direction.
Adjusting the Points, maybe create script that Connect Closes Points, or something similar.
In a way, Python code is used here to modify Points and we are using that Point data (positions) to do the placement of objects. This is all rather basic, but a good exercise for beginner Python artists (like me).
What would be really nice is if we can simply "Draw Curve" using Grease Pencil and let Python all the steps above. Maybe we can even write Python scripts that "Draw Random Curves" on Mesh.
Since in Blender we don't have all Node Based System for Geometry and Particles (yet), for now we rely on Blender Python. I have to say this business of modifying Points using Python is actually quite fun...
<< Now, I am doing research on how to do this using Python script .... please come back later >>