I am researching on a good workflow to do RETOPOLOGY inside Blender. Normally you want to retopologize super dense high resolution 3D mesh that is coming from 3D Scanning or 3D model that you sculpt using ZBrush, Mudbox, or using Blender's own Multi-Resolution Sculpting.
Below are some of the tools and notes I have collected online:
From Contour Add-On, I am thinking that perhaps we can make use of Blender Sverchok Add-On to create the CROSS SECTIONS based on HIGH POLY DENSE MESH (sculpted), and then from resulting Cross Sections, we can collapse and connect the dot to create and re-draw the mesh using Blender Skin Modifier.
STEP 1: Create Cross Sections from Dense Mesh using Sverchock
STEP 2: Collapse and connect the dot, then use Skin Modifier to have our rebuild mesh
STEP 3: Shrink Wrap it
Using this technique, I reckon that we can convert a dense 3D MESH you gather from 3D Scanning or 3D Sculpting, into a usable retopologized medium 3D mesh. In which then you can bake the: - Displacement Map - Normal Map
You might need to do more adjustment like re-directing some of the mesh topology to confirm with Muscles and so on.
I guess this style of re-topo will work best for parts that can simply be a 3D Contours Mesh, kind of like when you are using Cylinder and Shrink Wrap it.
FURTHER ON WITH CROSS SECTIONS
There is really something about CROSS SECTIONS technique that I really like.
If we reverse the process, perhaps we can use this cross section to measure wrist, waist, etc, and then re-generate or re-shape random generic 3D characters this way.
Have to think more....
BLENDER SUSHI WAY: DISPLACE & REMESH MODIFIER
Now, if you are really lazy, you can also take advantage of Blender Remesh Modifier. Kind of obvious way.
Here is the step by step:
1. Dense Mesh => Remesh Modifier (until it looks decent)
2. Apply Displace Modifier, push the skin slightly outward.
3. Shrink Wrap Modifier the mesh back into the high density mesh.
Well... actually the Remesh Modifier is kind of doing the "retopology" pretty good already. Most of the time. Shrink Wrap is kind of completes it.
WARNING: Of course, MANUAL RETOPO is still needed if you want to animate the 3D model. You kind of want the contours to follow the mesh flow.
LAPLACIAN DEFORM
I don't know if this is related or not. Maybe not. However, since it is a new SUPER COOL feature, I will point out about this new feature of Blender since version 2.70:
1. Set some Vertex Group, one VG to cover all vertex and more VG for the Hook (if you are using Hook) 2. Assign those Vertex Group into Laplacian Deform Modifier, this will be the Anchors. Attach the rest to the Hook objects. 3. Deform the 3D model using something like Bones (Armature) or Hook.
TO SETUP HOOK: Go to Edit Mode, select some vertices, then tap SPACE, type in "Hook to New Object". Doing it this way is fast, however, you don't get the Vertex Group history somewhat.
So... you might want to make HOOK yourself. By applying HOOK modifier and assigning the Empty as Hook and your own Vertex Group that you setup manually.
For the HOOK object, you may want to zero out the position in space. Do not do Apply Transform. Tips on ZERO-ing transform in Blender: Tap SPACE, type in "Animated Transform to Delta".
With this Laplacian Deformer, it will try to calculate the volume and maintain the volume, great for Squash and Stretch maybe? Or something that is more for sculpting?
WARNING: If your mesh is super dense, doing this kind of thing will take a while.
This is a kind of old trick that I might or should have shown to you sometimes in the past. I apologize if I was repeating the technique a little bit, but I think I will do it again anyway.
I think I can further expand the idea on how to distribute and position objects along Curve path:
The Procedural / Semi Manual Way
The Blender Python Way
This is probably the accumulation of some techniques that I have written in the past. It is like doing the same thing, but think of it in more sophisticated way.
"Position Along Curve" inside Maya
I have to show you this first, so you have better idea on what I am trying to do inside Blender.
There is this once-off-tool-function in Maya that allows user to position bunch of selected objects nicely along the active curve. This tool is actually build in Python:
I feel challenged to translate this Python tool from Maya for Blender using Blender Python. I have to look around first to see whether somebody out there already create it, so far I could not actually find it.
I thought this tool is very handy, but also a little bit stupidly implemented in Maya because it only does it in non-procedural way. The tool does the job, but it does not even have the option to align the object based on the direction of the curve.
Of course I am sure it is possible to create a setup in Maya where things can be more procedural and the effect is alive, but it does not come out of the box.
One thing though, Maya has nice Rebuild Curve, that simply does the job of resampling and rebuilding curve. Even so, Houdini actually does this kind of thing better with its Resample node.
Maya Rebuild Curve
Houdini wins in this case. There is no simpler way of curve resampling than how Houdini does it:
Houdini Curve Resample
I really think Blender needs Modifier that does this LIVE Curve Resample exactly. Hopefully in near future. It's my wishlist for years. Otherwise someone needs to come up with one whether it is in form of Python Script or Modifier.
Although Blender has Simplify Curve add-on, but it is not sufficient.
SORRY, THIS IS NOT "TANK THREAD" TUTORIAL
You may think that this is how to do Tank Thread tutorial using:
Array Modifier
Curve Modifier
Curve
No, this is not "Tank Thread" tutorial. But do Google for "Blender Tank Thread" tutorial, it's pretty cool and the effect is LIVE. It is a way you can place an array of duplicated objects (normally same object) along a curve just like Tank Thread.
The resulting curve is of course not very efficient, often too dense.
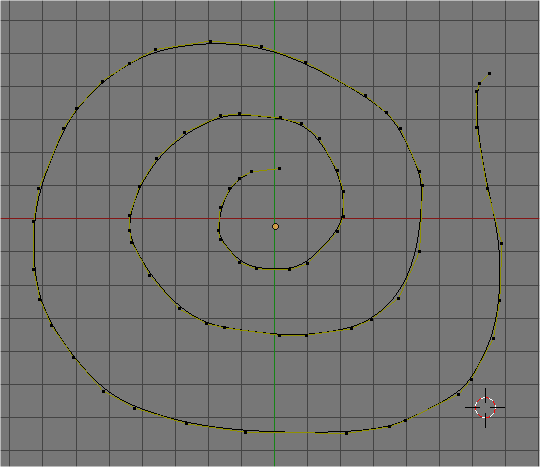
Perhaps you want to Simplify Curve (activate it from Add-On) first. We don't worry about even spaced Resampling for now. We just want a simpler looking Curve.
3. Simplified Curve
The result of Simplify Curve tends to be slightly smoother, which is nice. The simplified curve does not have evenly distributed points though.
4. Duplicate Objects using DupliFrame Now, we like to have a Dummy Object as our placeholder where we like to Position Objects Along Curve at later stage. Our Dummy can be just a scaled Cube for now. We will replace it with A Single Vertex later.
You should be able to do this by following the Wiki. Make sure:
Curve Scale is applied, otherwise the Object that is Parented and DupliFrame is gone crazy and disappear from the 3D scene.
Object to DupliFrame needs to also be reset to origin and placed at the Start of Curve.
Speed option under DupliFrame is turned off
Path Animation is turned on under Curve Tab.
DupliFrame total frame number matches the Path Animation total frames.
So you got something like below. Easy.
32 frames DupliFrame, Follow ON
You can also have something like below, if you turn off the Follow option.
32 frames DupliFrame, Follow OFF
At this stage, you can do Resampling as you pleased.
64 frames DupliFrame, Follow ON
5. Switch Data You can switch the Data of the object into something else, like Suzanne (Suzanne is always a good reference for object orientation) if you like:
However, for our purpose in distributing and positioning bunch of Objects along Path, we do not really need to worry about that.
6. DupliFrame A Single Vertex I always think the way Blender handling Single Vertex is pretty awesome. Almost like Point in Houdini. A single vertex of Polygon in Blender is regarded as a real thing.
Turn your DupliFrame duplicate objects into a Single Vertex.
Although we lost the "procedurality" of being able to change the sampling, this is also the step when thing gets exciting.
You are probably already guessing where I am going with this. BLENDER MANUAL CURVE RESAMPLE:
If you connect the dots (Vertex) in order, as Edge (select 2 vertices and tap F), you are going to end up with a Curve that with even space sampling.
Instead of doing it manually, we can use Python for that:
import bpy ### 1. GET VERTICES POSITION IN 3D ### ob = bpy.data.objects['myVerts'] # assuming there is an object named "myVerts" verts = ob.data.vertices vertData = [] for vert in verts: print(vert.co) vertData.append(vert.co) ### 2. THE RE-CONSTRUCTION OF EDGE MESH ### scn = bpy.context.scene # Create Mesh Data myMesh = bpy.data.meshes.new('myMesh') # Passing some XYZ data for Vertex Location #vertData = [(0,0,0), (0,4,0), (4,4,0), (4,0,0)] # Connect pair of Vertices data as Edges based on list order of vertices edgeData = [] a=[] b=[] for number in range(len(vertData)-1): a.append(number) b.append(number+1) edgeData = list(zip(a, b)) faceData = () # Finally putting all the information together into Mesh Object myMesh.from_pydata(vertData, edgeData, faceData) meshOb = bpy.data.objects.new('myOb', myMesh) scn.objects.link(meshOb)
Grease Pencil Stroke (convert to dense Curve)
Simply Curve
Dupliframe a single vertex within certain distance
Connect the Dots (connecting points using Python), assuming the point is in order (it should be)
Apply Skin Modifier
However, we does not stop there. We will continue and use Blender Particles to easily do the BEADS like distribution, this is piece of cake since we already have nicely distributed Points.
BLENDER POSITION ALONG CURVE (THE SEMI PROCEDURAL WAY)
7. Blender Particles and Instances to Distribute Objects We learn in the past that Blender Group can be used as Instance object for Blender Particles, which is really cool in itself.
We simply create some beads for example, I will do my usual Colorful Beads:
Group the Beads in order and then Instance it to the Points, I will highlight all the important values you need to change:
So you get something like this:
You can activate Instance Random and play with the Seed Value of course:
Those guys instanced are really Particles, so you can play around further with that and the Instance will follow. What is cool is that you still have control over the Object being distributed along curve Path.
8. Particle Instance Modifier for other object The Point Cloud mesh that is emitting Particle and distributing Group of objects still have Vertex Normal information along curve. This can be proved if you actually apply Particle Instance Modifier into another object, like Monkey for example:
The original Particle Orientation can be adjusted. Although limited.
What would be nice is to be able to do all that directly by using Python. This is definitely a really good Python exercise to do because it will be involving LIST and SLICE.
POSITION ALONG CURVE & REBUILD CURVE IN BLENDER USING LOOPTOOLS GSTRETCH X GREASE PENCIL COMBO
(THE HACKY BLENDER SUSHI WAY)
Knowing the method above, we can probably use Blender Python script tools out there that does similar kind of thing.
GStretch does the thing that I wanted, which is to "evenly place position of points on Grease Pencil". I will probably study the Python script of this GStretch and found out how Crouch does it.
Anyhow, I am using GStrech (feature of Loop Tools) like this: 0. Make sure you already install and run Loop Tools Add On from User Preferences.
1. Draw a line and give it subdivision numbers that you like, the total subdivision will account as the "Curve Sample". For example:
A Line (with 2 vertices) = 1 Edge Sample.
A Line (with 2 vertices), subdivided cut 10 times = 11 Edges Sample, 12 vertices
A Line (with 2 vertices), subdivided cut 32 times = 33 Edges Sample, 34 vertices
Let's try small number like 10 Cuts of Subdivision for now:
3. Now, quickly draw your Grease Pencil freehand stroke as you like anywhere in 3D space.
4. Next, while still in Edit Mode and having all the vertices selected, simply call GStretch function by tapping Space and find GStretch.
5. Magically the selected Line Vertices will snap evenly along the Grease Pencil!
6. Now, it is easy to place some objects evenly spaced along the Curve! (using DupliVert or Particle Instancer for more sophisticated arrangement)
Here is video tutorial for this hacky technique:
NOTE:
Watch out for the Vertex Orders of line. You probably want to Sort the Vertex Point orders of the Line before doing this so that your placement of objects is exactly as you want.
This way will work, but it is hacky and require some strange procedures. I supposed the best way is to just use Python Script.
Additional Explanation from Bart regarding GStretch in LoopTools:
The basic methodology of GStretch is the following: getting the user input, which consists of some connected selected vertices and a grease pencil stroke. It does some checks to match up which vertices will have to go to which stroke, as it accepts multiple simultaneous inputs, but you do not need to be worried about that. It then calculates the total length of the grease pencil stroke (simple math, using the coordinates of the stroke points) and creates a list with the cumulative distance from the start to each stroke point. For each vertex, the relative position along the stroke is calculated (e.g. 10%). Using the list of cumulative distances it determines between which two stroke points the vertex will need to be moved to and how far along that line. It all sounds a bit abstract, but I would suggest studying the functions "gstretch_eval_stroke()" and "gstretch_calculate_verts()".
The basic methodology can be adapted to many situations, for example to evenly spreading objects along the curve, instead of single vertices.
UPDATE 2014.03.12:
On the note of SPACING vertex along currently selected Vertex, along Path, you can also use the Space function of LoopTools.
Smoothing and resampling is slightly more tricky. You would have to calculate a curve through the stroke points, probably using some kind of resolution parameter and a non-linear least squares regression. It's possible, but it's probably easier to use Blender's built-in methods for that, or do some object type juggling. E.g. grease pencil -> mesh -> smooth (or relax) -> curve -> grease pencil.
Thanks to Bart Crouch and his awesome LoopTools//GStretch!
If we just want that, we can have it right away. But this is too simple, not much of options and the result is just newly created polygon boxes position along the curve (Vertex/Point positions).
We can modify the Python script above so that it will:
Place bunch of user selected objects into their new position along Curve Path. The objects could be the same total number or less. Blender should repeat and duplicate the list of objects if required.
Create bunch of objects in a LIST into the Curve Path (which is now simply Vertex/Point positions)
Randomize or reorder the LIST using Python
Aligning the objects in the LIST based on Normal direction.
Adjusting the Points, maybe create script that Connect Closes Points, or something similar.
In a way, Python code is used here to modify Points and we are using that Point data (positions) to do the placement of objects. This is all rather basic, but a good exercise for beginner Python artists (like me).
What would be really nice is if we can simply "Draw Curve" using Grease Pencil and let Python all the steps above. Maybe we can even write Python scripts that "Draw Random Curves" on Mesh.
Since in Blender we don't have all Node Based System for Geometry and Particles (yet), for now we rely on Blender Python. I have to say this business of modifying Points using Python is actually quite fun...
<< Now, I am doing research on how to do this using Python script .... please come back later >>