Remember, the primary goal of photographing and editing photos of your artwork is to make the final image as visually true to the original artwork as digitally possible.
"Paisans", oil, 9" x 12", the final corrected web image
Wow, where did the time go? Bet you thought I'd never post another tip.
I'm never one to upgrade too quickly; bugs need to be worked out, the price can be high, and are there REALLY cool new tools you can't live without in the upgrades? Maybe yes, maybe no. But when I found Adobe CS3 Master Suite at a sweet discount (and yes, yes, I know that CS4 is the latest thing), I caved, mostly after months of having to beg a 'Mac' friend to revert EPS logos for me for Illustrator (you know who you are, JC, and thank you! By the way, I checked just now; Amazon has Photoshop CS3 for about $150. Not too bad).
As it turns out, as I've been trying out the new tools, I did find a very useful one. If you're lucky enough to have CS3 of CS4, try out this new trick:
Shadow/Highlight Adjustment
Step one:
Really handy for the times when your photo contrast is too dark.
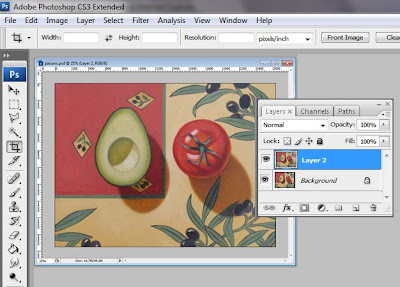
In the case of our step one photo (below), the image is just a bit too dark all around.
Really handy for the times when your photo contrast is too dark.
In the case of our step one photo (below), the image is just a bit too dark all around.
so, as we've done in all past tutorials, start by opening your original file, save a copy of it, and make a copy of the background layer.
Step two:
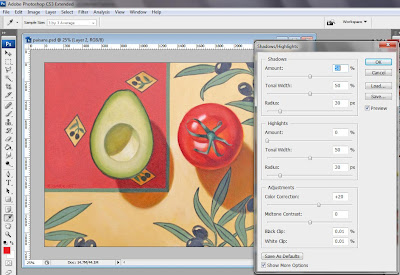
On your toolbar, go to Image/Adjustments/Shadow Highlight
as shown below. Click on it.
as shown below. Click on it.
Step Three:
A big, long dialog box will pop up. Not to worry, most of the default settings are going to be just fine for now. Tinker if you like, but don't sweat it. At the bottom, if the 'Show Preview' box is checked, you'll notice your image is magically brighter! Maybe Too Much, but we can correct that later. Treat your first few tries at this as experiments, and just click on 'OK'.
A big, long dialog box will pop up. Not to worry, most of the default settings are going to be just fine for now. Tinker if you like, but don't sweat it. At the bottom, if the 'Show Preview' box is checked, you'll notice your image is magically brighter! Maybe Too Much, but we can correct that later. Treat your first few tries at this as experiments, and just click on 'OK'.

Step Four:
Okay, now let's say it's a bit TOO bright. Two things you can do here:
One, always remember that Ctrl + Shift + F (Cmd + Shift + F for Mac users) will always to adjust the opacity of any filter. So try that first, maybe at about 50%, and see how it looks. Ah, much better.
Step five:
If further contrast correction is needed, I'd suggest going back to our old pal, the Levels function. If the color or hue is off, check through our other tips for ideas.
If further contrast correction is needed, I'd suggest going back to our old pal, the Levels function. If the color or hue is off, check through our other tips for ideas.
Every artwork you photograph is going to have its own set of quirks, based on the color and contrast of the art itself, the lighting conditions, and whatever camera you may be using. Often you'll find you need to use more than one adjustment to get the photo looking like the art. With a little practice, you'll find you can do it very quickly. Have fun!
Questions? Always welcome.
.


Post a Comment