I got a feeling that Blender New Particle system could make it happen when the feature is more mature and allowing Particles to have more control for other attributes.
 |
| I basically wanted to recreate that X-Men effect of skin morphing changing. The concept is there, but not yet. |
Anyhow, I figure that there is one more possible way to achieve this effect using Dynamic Paint and the old Blender Particle system.
This is rather "advance" effect, but worth trying. It's a challenge.
THE FLIP-FLOP EFFECT
In one sentence, the effect is = Switching Instances using Dynamic Paint.
There are 2 facts that make this happens:
1. Dynamic Paint can influence the Particle INSTANCE Size via Hair System.
2. The Vertex Weight of Dynamic Paint can be easily inverted.
Unfortunately, the actual Particle Size cannot be influenced directly by Hair (unless I am wrong).
So, at this moment, the only way you could affect the Particle Size by Dynamic Paint is by affecting its Instances, whether the Instances you created via Particle Instance Modifier (to get hair like effect), or direct Particle Instances.
ONE THING, If only I know how to "convert" a Mesh Objects Grouping into correct order of Particle Instances, then this effect could potentially be really cool. Unfortunately I don't know that. Maybe that is achievable via Script. I probably gotta ask Liero for that.
LED GRID
So, let's try something a little simpler, like a 25 x 25 Grid LED Spheres. Total of 625 Particles Instances to represent a single color (well, actually multi color is possible too, we will see later).
We will render it with Cycles so we will set the material properly from the beginning.
What we need:
1. A sphere with dark color. Just Diffuse Material with dark color.
2. A sphere with bright color, we want them to emit light, so use Emission Material.
THE TEMPLATE
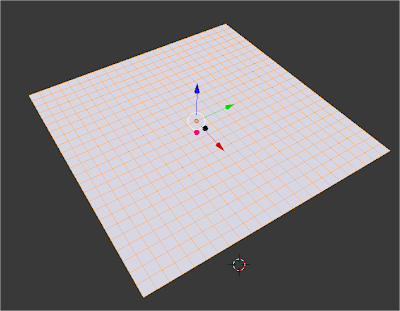
In this case, we could just use a Grid object as Particle Emitter.
We will have 2 Particle Systems, one for FLIP, the other for FLOP. The steps are basically like this:
1. Create Particle System from the Grid.
2. Emit from Vertex, uncheck Random. Specify the number of Particles you want to born (625 in this case), born all particle on frame 1.
3. Turn off Gravity Field and Emitter Geometry Normal Velocity.
4. Assign your Instance Object.
5. Create the Dynamic Paint (DP) environment. The Grid = DP Canvas. Create another object (any mesh shapes) = DP Brush. I will just use Cube as DP Brush for starter.
6. Activate Weight and create dp_weight the default Vertex Weight.
7. Now, we switch Particles as Hair. As we know already, this is when the magic happens, when you assign the dp_weight into Hair Length. And then, just increase the Hair Length to minimum 1.
NOTE: One important thing. Make sure that Dynamic Paint is above Particles System on the Stack Modifier order, otherwise, the effect will not work properly.
Remember if you create 1 Particle System with this Dynamic Paint influence, you can simply DUPLICATE another one.
FLIP FLOP IS READY
Now, we already have the Particle Systems setup. You just need to create another one. The minimum you have 2 Particle System, but with the weight Inverted under Hair Length.
 |
| This is FLIP. |
 |
| This is FLOP. |
Try different shapes of Dynamic Paint Brush and maybe the Projection type of Brush.
The cool thing about this setup is that you can easily change the number of LED or the GRID, from 25 x 25, maybe to a higher number. And everything will work fine.
If you want to have multiple Grid with different Color, and then with DP Brush affecting only certain color, that is fine too. You can certainly do that. You may just want to get rid of the Darker LED and just have the Bright LED.
Since this is kind of complex effect, I provide you with the BLEND file for you to study and experiment.
Download the Blend at BlenderSushi SkyDrive:
http://goo.gl/NzFRC
TIPS:
- How to adjust the DP Canvas Template Grid? Just hit TAB and you can quickly modify the template grid. In fact to change from 25x25 LED to 64x64 LED is quite easy. Just delete the original grid in Edit Mode and replace it with any grid size.
- Try creating different DP Brush meshes and the effect will work instantly.
- Any 3D Mesh can be the Brush for the LED, that also includes Grease Pencil!
- Remember you need to be at frame 1 (if playback is not animated) for Dynamic Paint to have realtime preview on 3D View.
- Start with the basic 2 LED color before you try more than 2, it gets complicated. You could also Mix the Dynamic Paint Vertex Weight which is beyond this post.
 |
| The effect also works in 3D. |
Have fun with this effect! Let me know if you have problem with BLEND file or if you have any questions.
UPDATE 2012.04.25:
For quicky face changing effect, you can use Mask Modifier and Dynamic Paint to do the switching of Faces of mesh? That's neat. Give it a try:
Now, you may want to add some particles effect on top of this.


Post a Comment