 |
| Wireframe reloaded! Again... |
Latest Build of Blender 2.64 adds some packs of new and improved features. Apart from Skin Modifier that is now nearly official, a better Collada DAE export-import (now with built in options), there are some list of great features added:
One super COOL hidden feature I just noticed by reading the Blender Wiki and I really like in particular is the WIREFRAME Tool. This comes to me as another pleasant surprise of Blender, totally unexpected and it is added for convenient of users.
In the past, we would use all kind of ways to get wireframe to happen such as converting mesh into edges into curves. All old techniques are still valid, but this Wireframe Tool will do the job for you very fast, simple and easy.
TURNING MESH INTO 3D WIREFRAME GEOMETRY
Just in case you are a total newbie to Blender, below step by step is all you need to convert polygon mesh into Wireframe. Advanced Blender user will figure this out.
1. ADD 3D MESH PRIMITIVE OR IMPORT YOUR OWN MESH
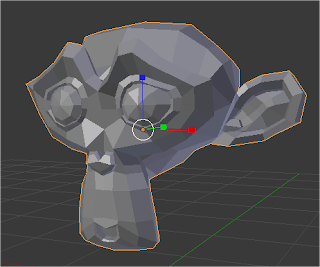
Shift+A to add object in Blender. Choose Mesh object. I will quickly use Monkey Mesh object. But you can go beyond the monkey. File Import OBJ allows you to bring your own mesh.
2. MAGICALLY TURN MESH INTO WIREFRAME WITH FEW HOTKEYS
Select your Mesh object by RMB click. Hit TAB, to go into Blender Edit Mode. While object still selected, simply tap Spacebar and type in "wireframe" (without quotation mark).
Click Wireframe and DONE!
NOTE:
Before you do the Wireframe conversion. You may scale up or down your mesh (tap S and move your mouse to scale up or down). This will affect your default wireframe geometry. But you could actually adjust the wireframe result by tweaking the parameter post-process, read below.
3. ADDITIONAL OPTIONS FOR WIREFRAME
Notice on the LEFT side of the bar in 3D view (Tool Panel), you actually have more options to adjust the Wireframe result. This is a once-off and post-process, you can only change it while you are still working on this mesh. Once you hit TAB again to go out of this Edit mode, you are no longer able to change the wireframe result.
4. GET MORE FANCY WIREFRAME
Further thing you usually want to do is to Smooth your 3D Wireframe Mesh. You simply do CTRL+1 or CTRL+2 or CTRL+3 to add Subdivision Modifier in level 1, 2, or 3. This smoothen your wireframe 3D geometry into something that looks like Spiderman web!
That's all for this post. Super easy yet fun and cool! I would like to see lots of wireframe 3D printed out. Even better, what if this can be turned into wireframe candy, such as handmade candy you usually buy on the street? Pretty nostalgic, right?
BLENDER SUSHI WILL GET REAL
Anyways, next few posts hopefully I get into more serious Blender production mode. I will focus on Character Development, Rigging, and Animation. I understand that all my previous Blender Sushi posts have been pretty "junkies" and "abstract" and "raw". You know that Sushi is a junk food right?
All seems to be like "play" not "work". But in fact, I found out a lot about Blender than I thought when I first gets hand on Blender version 2.5x. And I get to know some amazing Blender artists out there. It really comes a looong way. I salut all the Blender artists out there that have been using Blender for commercial and personal projects and develop your own works.
I will get real and write about "real" production stuffs. But I will try to make it simple for everyone to follow. Blender needs more tutorial on rigging and character animation. Blender Rigging DVD from Nathan Vegdahl is perfect start to learn Blender Rigging.
Until then, have fun with Wireframe Tool. Remember this tool is inside Blender version 2.64 official release or find and download latest Blender 2.64 Release Candidate.
UPDATE 20120923:
In the meantime, this is a really cool Blender Video Tutorial on Auto Rig Tool "Rigify" and Skin Modifier:
http://www.youtube.com/watch?v=o83K16Zwdos
That's really cool way to quickly prototype character.


Post a Comment