Lesson 5: How to Make a Banner with Pixlr
Getting Started
1) Open Pixlr Advanced
2) Go to the http://www.stockvault.net/
There are very good free images, of course, you can find another pictures from other sites too...
3) I am going to use the images from these URL's;
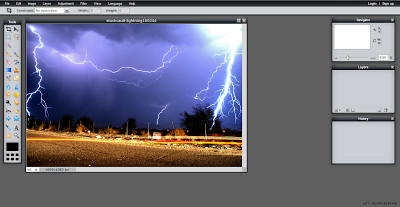
4) First browse your background picture. (For me its lightnings)
Resizing as a Banner and Cropping Moon
1) Open the Lightning image from your computer after downloaded.
3) Re size your image (It may change according to your usage) I am going to re size it 800x200
Recall: Lesson 2
2) Go to the Layer Menu on the right side of the screen and press the lock near the background writing. It will turn to a checked box.
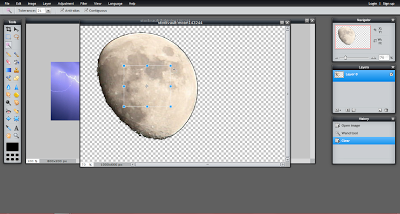
3) Use the Wand Tool (W) or Lasso Tool (L) to capture the object that you want to put in your banner. I will use the wand tool because the colours are clear. If the colors are mixed like green and yellow the wand tool usually not capable to surround the object. Don't worry :) There is Lasso Tool for you.
4) After surrounding the the object that you want, press Delete button and background of the image will be checkered. Now, it is time to re size you object according to your background size. You have to use Free Transform (Ctrl + T) in the Edit Menu.
5) Use Marquee Tool (M) to select the image which you will put in your banner (Moon), then copy it with using Copy (Ctrl + C) in the Edit Menu.
6) Paste it to the Banner image by using Paste (Ctrl + V) in the Edit Menu
7) Use the Move Tool (V) to put it where you want
8) You can re size it with using Free Transform Tool (Ctrl + T) again but make sure that Layer 1 is selected in the Layer Menu on the right side of screen.
1) Click on the Type Tool (T) on the Tool Bar.
2) Select the place that you want to add texture on the banner. Do not worry if you missed the exact place, because there is the Move Tool (V) which is quite helpful.
3) You can arrange the Font, Style, Size and Color in the Type Tool Menu
4) It's done. Save you new banner from File Menu.
Putting the Moon
1) Open the other image(s) that you want to apply to your background. I would like to put a moon image among the lightnings.2) Go to the Layer Menu on the right side of the screen and press the lock near the background writing. It will turn to a checked box.
3) Use the Wand Tool (W) or Lasso Tool (L) to capture the object that you want to put in your banner. I will use the wand tool because the colours are clear. If the colors are mixed like green and yellow the wand tool usually not capable to surround the object. Don't worry :) There is Lasso Tool for you.
4) After surrounding the the object that you want, press Delete button and background of the image will be checkered. Now, it is time to re size you object according to your background size. You have to use Free Transform (Ctrl + T) in the Edit Menu.
5) Use Marquee Tool (M) to select the image which you will put in your banner (Moon), then copy it with using Copy (Ctrl + C) in the Edit Menu.
6) Paste it to the Banner image by using Paste (Ctrl + V) in the Edit Menu
7) Use the Move Tool (V) to put it where you want
8) You can re size it with using Free Transform Tool (Ctrl + T) again but make sure that Layer 1 is selected in the Layer Menu on the right side of screen.
Adding Texture
1) Click on the Type Tool (T) on the Tool Bar.
2) Select the place that you want to add texture on the banner. Do not worry if you missed the exact place, because there is the Move Tool (V) which is quite helpful.
3) You can arrange the Font, Style, Size and Color in the Type Tool Menu
4) It's done. Save you new banner from File Menu.


Post a Comment