


 |
| Inspired by Hand Drawn art of Shigeto Maeda. |
Time for more snippets. Small little useful recipes to help you make a more sophisticated dishes.
SMART MASKING
- Mask List
- Mask Join
- SN Mask Set
I learned this from Linus (thanks Linus!). He also made additional node that adds feature to the "masking" in Sverchok. This is the ability to specifically mask editing of some components.
Let see how it works in an example.
Supposed we have a Line made with 10 Vertices like below. I am using Index Viewer Draw so that we can see the actual Vertices Index number. The index started counting from 0, so for 10 vertices, we have index 0-9. Let say I want to specifically edit vertices with index number 2, 3, 6, 7.

I will summon the Mask List and Mask Join node. In the past, we only have the Mask Join node and although it is good for certain tasks, it is also limited. Mask List together with Mask Join can do more.

We know from before that in order to create "mask" we need to supply a True or False list, or a list with 0 and 1 numbers.
List pattern of 1 or 0 (True or False) can be generated using Formula2 node if the number has pattern and that is more procedural too. However, if we want to specifically give some list of index number, we want to use a helper SN script called "mask-set" from Ly.
When you download Sverchok ZIP, inside it you will find some "hidden" folder library of SN (Scripted Node) scripts. They are a collection of additional Python code that you can load into Sverchok Scripted Node and it will function like a real node.


We just want the "mask-set". I usually copy the script from its original folder into the main "node_script_templates" so that it will appear in Sverchok Script Node template library viewer.
Anyway, to cut the story short, just load the script into "Scripted Node" aka "Script Generator" inside Sverchok node-tree. After you "Import Template", just click on "Load".


Now, this little node needs its own setup to work:

In the Formula2 node, I specified the index of vertices that I want to mask. With List Length and List Range, we basically generate a list of all index numbers.
The Mask List itself will do the work and spit out True or False list like below that we can use with Mask List and Mask Join:

So finally we can edit and move those specific vertices:


I move up those vertices specifically.
Seems like a lot of work to do "mask" editing, isn't it? Well only the first setup. Because we can always re-use this "compound setup" for other purpose quite easily.
For example, I want to create a house shape from Box node, I simply move up vertices number 14, 15, 16.

And we can also create Procedural Star from Circle by selecting "every other" vertices and move it in or out. The total number of vertices need to be an even number in this case.

That's how really the basic idea to create procedural hairy creature the Susuwatari below.
 |
| Susuwatari (c) Studio Ghibli |
Below we have Smart Masking setup example from the genius Nikita aka Nikitron:

LIST INPUT NODES AT WORK
Often time we are in situation where we need to have a single node that can output multiple values, that is when List Input Nodes can come in handy.It seems really obvious that List Input can do this, however, sometimes I forgot.

The above setup is certainly better than below (not quite as elegant):

With List Input, we can take advantage of quick edit.

I use this actually for lofting each leg of Spider Limb.
BMESH BAKE OUTPUT MESH WITH MATERIAL
In recent version of Sverchok, we have now the ability to specify Material for our mesh. This is pretty self explanatory, but anyway below is such example.
PYTHON FOR SVERCHOK NODE TREE
This almost escapes my mind, but that is because I am still familiarizing to work inside the Node Editor. We can make use Python scripting handy when working inside the Node Editor. Just like when we are doing Compositing or creating Material in nodes, we can use Python scripting.Sometimes all we need to do is to peek into the History and then reuse the script to modify the nodes.
Multiple Mesh Baking
Let say, we end up with node setup that require multiple mesh baking like below. We have many mesh that needed "Bake" button to be pressed.

If I manually click on the "Bake" button anyway and peek into the History, I will get the Python script that reflects what I just did.

You can copy and paste those code into Text Editor. Remember to do "import bpy" before running the code. The code can simply be like below:

You can tidy up the nodes even further, make the code more elegant, let say to take nodes with list of names you specified. No worries, you will learn about this eventually.
Next time you want to bake those nodes, you just simply run the script from Text Editor.
Resetting Values
Similar to above, you can also watch the History panel and see what Python script is executed when you change the parameters.

Eventually you will need to care more about Node Name + Label. Node Name is more important because it is what the script will be referring to. You definitely cannot have Node with the same name. But you can Label them with a same name.

I need to look around to find out how to do this below:
- Arranging nodes layout using Python
- Connecting/Disconnecting node using Python
- Creating and deleting node using Python
QUICK SNIPPET LINKING AND CREATING NODES
Found this. But was a bit outdated and actually for Node Compositing.
http://blenderartists.org/forum/showthread.php?271813-Connect-nodes-in-python
Then I figure out we can do this:
import bpy
tree = bpy.context.scene.node_tree
comp = tree.nodes.new('CompositorNodeImage')
RL = tree.nodes.new('CompositorNodeRLayers')
comp = tree.nodes.new('CompositorNodeComposite')
link = tree.links.new(RL.outputs[0], comp.inputs[0])
However the layout then need to be arranged somewhat. So that is something to keep in mind.
Anyways, after a bit of trial and error, for Sverchok Node Tree, we apparently can find the node tree data inside the Node Groups:
import bpy
NG = bpy.data.node_groups['NodeTree']
OI = NG.nodes['Objects_in']
VD = NG.nodes['Viewer Draw']
# print out all the nodes name
for node in NG.nodes:
print(node.name)
# link the two
link = NG.links.new(OI.outputs['Vertices'], VD.inputs['vertices'])
# create a new node of certain type
VN = NG.nodes.new('ViewerNode')
And... this is if you want to change some node stuff for Materials.
http://blenderartists.org/forum/showthread.php?321177-How-can-I-add-material-Diffuse-BSDF-to-object-using-python-script
Have to do this:
bpy.data.materials['Material'].node_tree.nodes['Material'].inputs['Color'].default_value = 1,0,0,1
Instead of this:
bpy.data.node_groups["Shader Nodetree"].nodes["Material"].inputs[0].default_value = (1, 0, 0, 1)
Creating Interface for Sverchok Setup
Now, what would be nice is to have those script as a Button or some kind of GUI interface. You can use Blender own's interfacing, but since we are doing it inside Sverchok, it would be nice if we can have a node with simple interface (Button, etc) and able to run the script, all from within encapsulated node.
That is when you want to look at Scripted Node (SN).
GETTING INTO SCRIPTED NODES (SN)
I wanted to cover Scripted Nodes (SN) in one big articles or many articles in near future.
I am really still a newbie in term of scripting and coding, slowly getting into it. Eventually there will be time when one need to be comfortable in both Coding and Noding, it will take you far.
You probably already know this fact:
Sverchok inside Blender is actually a perfect Add-On to help you becoming good with both coding and noding, to understand advanced procedural and parametric workflow.
By no means "easy", this is when you are exposed to complexity. Trust me, this used to be a lot harder, all these tools make learning complex things less steep.
By no means "easy", this is when you are exposed to complexity. Trust me, this used to be a lot harder, all these tools make learning complex things less steep.
Start from here:
ScriptedNode_documentation.md => find it inside Sverchok folder.
ScriptedNode_documentation.md => find it inside Sverchok folder.
For example, below is a SN magic by Ko, generating Text on the fly using Sverchok data. Apparently the Formula2 node is also a single liner Python code executor.

HEAT MAP AND NODE BAKE TIME
When working inside node-tree, especially a complex one, we will start noticing the time it takes to update/refresh per frame update.
Sometimes we want to be able to know how long it takes to bake each node. What node is causing the "slow down". Which node is slowest to calculate.
You can print such data from the Sverchok Add-On Preferences "Print Update Timings" and look at the output on the System Console.
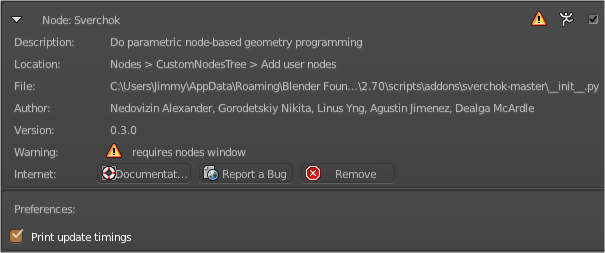

Sneak peek:

USING BOUNDING BOX CORNER AS MATRIX PIVOT
- Matrix In
- Matrix Apply
- Matrix Deform
Spend some time inside Sverchok and sooner or later you want a better understanding of the Matrix for transformation of mesh.
I am also still in the process of having a better understanding of how we could use the Matrix Data. What more importantly is how Matrix is used to generate or modify mesh or to set the pivot point of mesh.
In general 3D, we normally don't care too much about Matrix data, although we are actually using it all the time, especially when we are doing things like: Transforming object (Move, Scale, Rotate from axis), Freeze Transform, Rotate from X pivot.
Try a setup like below, load the Default Cube into Sverchok and we will modify it:

Try changing the value of the Vector In that goes into Location and Scale sockets of Matrix In.

Now, that effect does not always work magically like above. Sometimes we do want that kind of transformation effect to happen. As if we moved the Transformation Pivot into a different point, whether it is an arbitrary point in 3D space, or Empty location, or maybe from Bounding Box corner.
Let's move pivot into Bounding Box corner, it is more fun.

To get the Bounding Box Corner Point, we use SN script below from Linus:
def sv_main(bbox=[[]]):
in_sockets = [
['v', 'BBox', bbox],
]
s_type = ["v" for i in range(8)]
name = ['D','C','H','G','A','B','E','F']
if bbox[0]:# check that we have input
data=[ [[bbox[0][i]]] for i in range(8)]
else:
data = [[] for i in range(8)]
out_sockets = list(map(list,zip(s_type,name,data)))
out_sockets.sort(key=lambda s:s[1])
return in_sockets, out_sockets
The setup above does the procedure below:
1. Get Bounding Box.
2. Get a point from Bounding Box Corner
3. Prepare the Matrix, customize the pivot point for our mesh.
4. Edit and transform the object from the custom pivot.

That makes a point that we need to care about the Transformation Matrix of our Mesh. This is also useful when we are dealing with multiple objects and we are setting up Parent-Child Hierarchy.
If we have a simple head like Pinnochio head like this, we want to pay attention to the Transform Matrix of each parts of the head (hat, left eye, right eye, and nose).

If we set everything correctly, we will be able to have control over the mesh matrix transform while maintaining the structure and relationship.
 |
| Simple Procedural Pinnochio |
Post a Comment