(SEMI) REBUILD CURVE / RESAMPLE LINES
- Interpolation SV Node
- Range Float SV Node
- Lines Connection SV Node
 |
| Dense Grease Pencil Output |
In recent Sverchok update, we now have the Interpolation node that can help us to resample or rebuild curve, and since Sverchok can also bring in Curve object, together this feature really comes in handy!
The COUNT in Float Series node will define the Resampling Points along the Curve. In order for us to be be able to output something useful, we want to also use Lines Connection node.
If we want to evenly spacing a Lamp Pole, or Trees, we can now do that very easily. Perhaps parametric Table and Chair? Below is such example.
NOTE: if you want to have the ability to OFFSET IN / OUT the Line Profile, you want to convert it the mesh back to Curve and the process it like below. You see how the Blender normal workflow can work together with Sverchok procedural/parametric workflow.
 |
| Sverchok Grease Table. |
 |
| Everyone can make a table now. If only we all have 3D Printer! |
SIMPLE EXTRUDE IN SVERCHOK
Remember in the previous post when I said that we "cannot" do Face Extrude? Well, I was wrong, there is always a way to do it. Thanks to +zeffii to show me the way. The answer is SELECTIVE SOLIDIFY.- Solidify
- List Mask
- List Item
Supposed we start with a Plane or Grid of some sort. Simple 8x8 grid.
We know that if we "Solidify" an object, we get thickness and it is a bit like Face Extrude, but happens for the whole face.
How do we selectively "select" something? Well, we don't have that feature yet, but we have way to mask things out, such as below using List Mask:
The result is not perfect. Maybe List Mask is not what we want. Is there another way to do this? How about LIST ITEM? Yes, this is the one we want.
Now, later on I found out that similar to the result of Solidify and List Mask, this Solidify and List Item are also giving result that's not perfect like below:
However, we have a different and more means to control over the FACE EXTRUDE besides the Adaptive Polygons
SVERCHOK LATHE
Sometimes it's also called Revolved or Screw, we have now this LATHE NODE in Sverchok!
Often overlooked feature like Screw Modifier, this Lathe node is more powerful that one might think at a glance. It is very straight forward to use, it does not need much explanation. Just supply an Edge or Curve of some sort and use it as INPUT for Lathe Node.
You definitely want to experiment and get to know what INPUT PARAMETER you can adjust below. It works similar to Screw Modifier.
You also want to remember to "Apply Matrix" if you are moving the Edge/Curve Profile in World Matrix, so that the point position is confirmed, to get the result below:
Use "Merge" option if you want to "Remove Double". The "Degrees" and "Steps" are obvious to give control over the 360 Lathe rotation.
There are 3 more interesting parameters to play with, you need to feed them with Vector, simply use Vectors In node with these guys: "Cent", "Axis" and "DVec"
"Cent" I believe is the CENTER of Lathe rotation. I actually like to use this with Empty and get the Matrix. By doing that, we have interactive control in the 3D View and Sverchok updates accordingly.
"Axis" is the AXIS you want the Lathe to go around. Feed this with Vector like [1,0,0] or [0,1,0] or [0,0,1]
"Dvec" is probably the Distance it would OFFSET around. "Dvec" option allowing us to create SPIRAL STAIR kind of effect. It will generate a twisty mesh and goes around as many times as you like.
We now have more ways to build endless KORIN TOWER (like in Dragon Ball anime):
BAKING IT OUT WITH BMESH VIEWER
To bake out Sverchok mesh, at this moment, I think the best way is to just use BMesh. We could probably use Grid Matrix to randomly spit out variations of Mesh. that will be cleaner, but often time it takes additional steps to setup.
Using BMesh and Blender's own OBJ Animation Export, we can output OBJ out to be used as Instance Reference objects.
NOTE: I recommend you to use BMesh at the very last moment if you want to bake out the meshes.
1. Use BMesh Viewer at the very last of Sverchok node train chain.
2. Select the BMesh from Outliner or by clicking on Select on BMesh Viewer node.
3. The BMesh will change every frame and generate a different mesh per random Seed.
4. Export OBJ Animation while the BMesh is selected. Specify Animation and Selection Only.
5. Save it into a folder.
Exporting OBJ is totally fine, but Importing those multiples OBJ back into Blender is actually .... tricky. I am afraid Blender could import multiple OBJ at once! Unless I am missing something.
I did mention about this way back ago, and we can use script to do that. All we need to do is to run the Python script that is pointing to the path folder where we have all the OBJs:
NOTE: In Maya we can also Drag and Drop OBJ's into Maya window :) I guess we can ask Blender Developers to allow OBJ drag and drop. Nothing is impossible.
WIGGLE NOISE DISPLACED TEXT
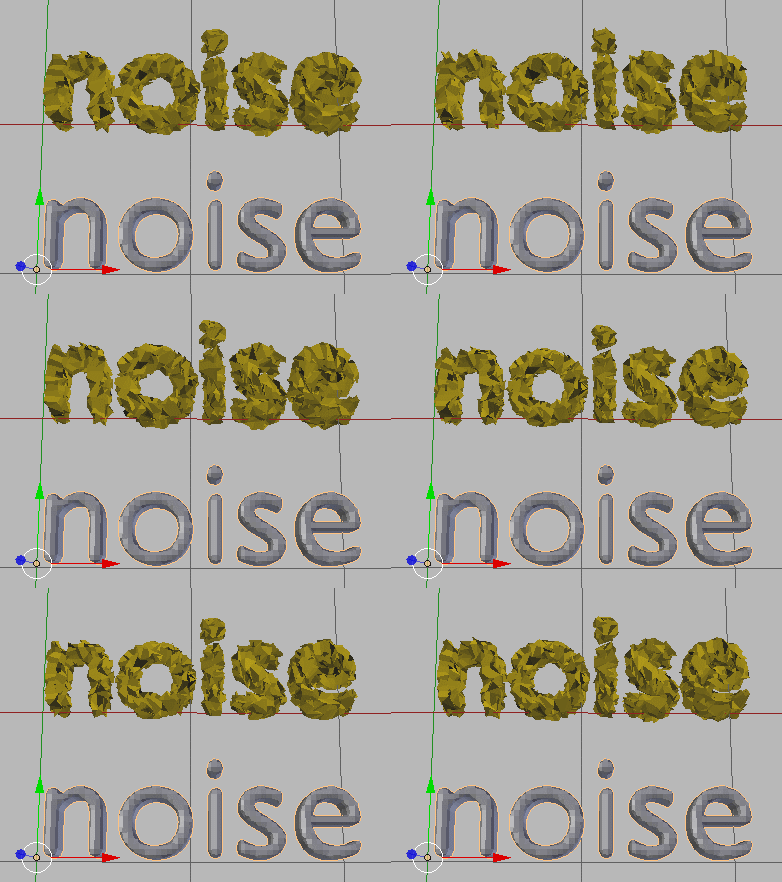
I experimented a lot with Blender Modifier. I found it quite amusing when Text Object allows some Modifiers stacking. Which is very cool. On top of that, Sverchok Developers also gives this capability. So, while the Text Object is still LIVE (we can change the text), we can go inside and mesh around with it.Below is another example using Noise node. Noise node is limited in parameter at the moment, but we can sort of hack it in a way we can control the scaling.
TRY: Drive Sverchok parameter using sound WAV.
MESH SNAP TO GRID
I found this setup by accident. What if we turn all the XYZ Position of Vertices into INTEGER value, meaning it will snap (rounded) to the nearest full number.
We can came up with an interesting abstract looking object.
Suzanne the Monkey mesh becoming like:


Post a Comment